Corticon 5.7 Batch Processing Quick Start
Batch processing has arrived in Corticon 5.7! Learn how to process large datasets at one time with the Advanced Data Connector (ADC).
With version 5.7, Progress Corticon has introduced batch processing, in which a Decision Service can process very large datasets at one time with the Advanced Data Connector (ADC). Administrators can automate and manage the batch process with Corticon Web Console and the Server REST API.
This article describes how to try out batch processing using the sample code bundled with Corticon Server.
Before diving in, be sure you have installed:
Download the Sample Project
To prepare for batch processing, first set up and configure ADC using a sample project included with Corticon. ADC connects to a database and accesses its data for the Decision Service to process. To do this, ADC uses database queries and a Service Callout, a custom-written function included in a Ruleflow.
To install this sample:
1. In Corticon Studio 5.7, select Help -> Samples.

2. Scroll to the Advanced section on the left-side of the screen and click ADC Database Connectivity; then click the Open button.

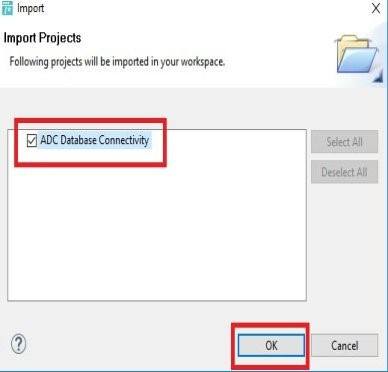
3. Make sure ADC Database Connectivity box is checked and click OK.
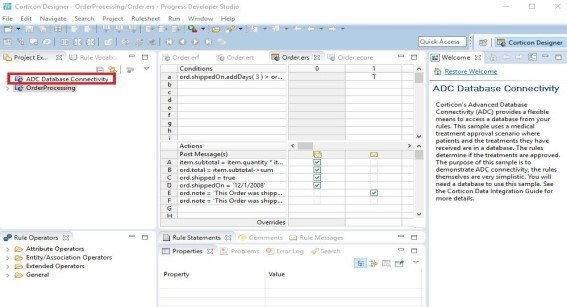
4. ADC Database Connectivity project should be imported. You’ll see it in the Project Explorer window.
Configure ADC
Now you can set up ADC to run the sample project and test your connection. The sample project does the following:
- Provides adc and patient scripts to create a database with schema and data information
- Imports metadata into the Vocabulary
- Defines a database connection for ADC
- Maps the DB schema and queries
- Adds a link to the required [CORTICON_HOME]\addons\CcADCSco.jar file for the service callout
- Sets the Ruleflow query
1. Create a database named PatientRecords in a network-accessible database. Make sure the database is setup to connect with the provided credentials. For example, use SQL Server Authentication and not Windows Authentication.

2. Expand ADC Database Connectivity project and find the adc and patient SQL scripts for the appropriate database product.
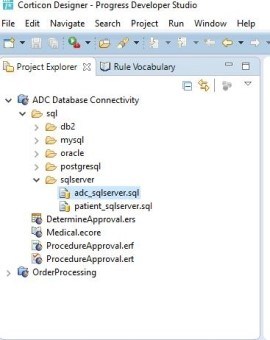
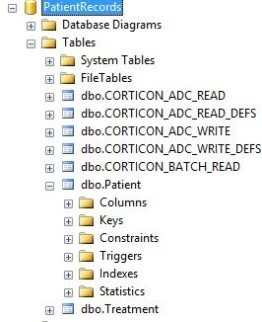
3. Execute the scripts in a database management tool’s editor. The scripts create ADC, Batch, Patient and Treatment tables in the PatientRecords database and update the tables with data.
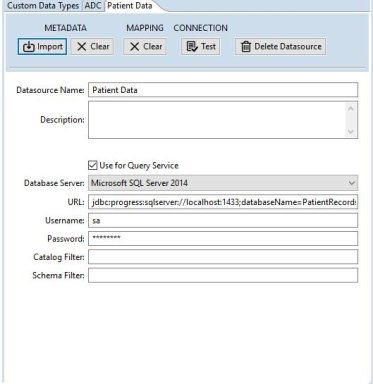
4. Make sure your database connection information is correct by selecting Add Datasource -> Add ADC Datasource in Corticon Studio.

5. Click the Patient Data tab in the screen that appears and make sure the Database Server, URL, Username and Password are valid.
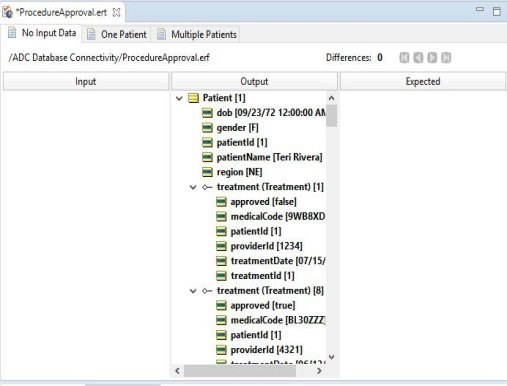
6. Execute the No Input Data Testsheet in the ProcedureApproval.ert Ruletest to test that ADC was configured properly. The following output should be displayed after execution.
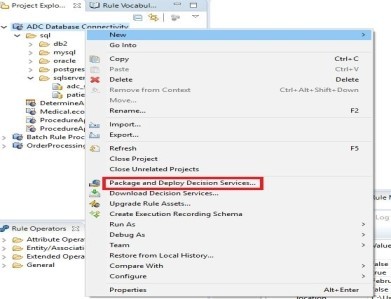
7. Compile the ProcedureApproval ruleflow by right-clicking on ADC Database Connectivity project in the Project Explorer.
8. Select Package and save for later deployment. Click Next.
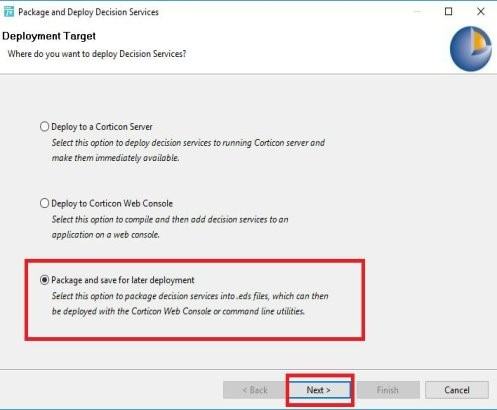
9. Then click Finish.
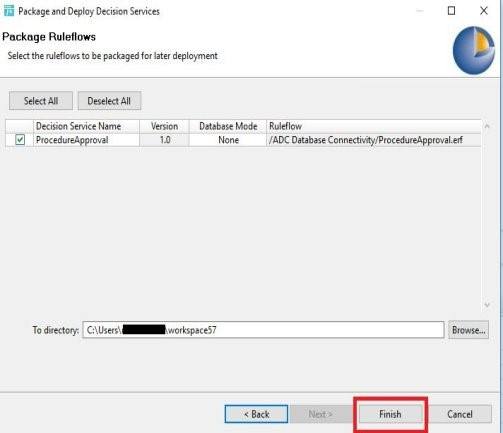
10. Export ADC Datasource metadata from the Vocabulary to an accessible directory, such as C:\Users\<user>\workspace57\ADC_Sample.xml. Your Decision Service is now ready to receive batch data.

Load and Run the Batch Sample
The Batch Rule Processing sample project contains two scripts to help test batch rule processing on very large datasets.
1. In Corticon Studio 5.7, select Help -> Samples.
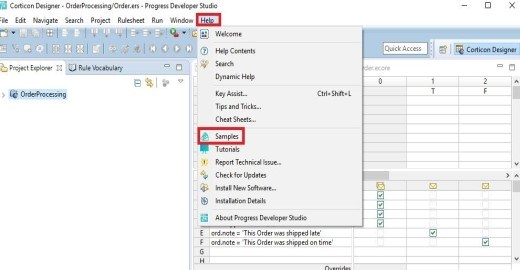
2. Scroll down to the Advanced section on the left side of the screen and click Batch Rule Processing; then click the Open button.
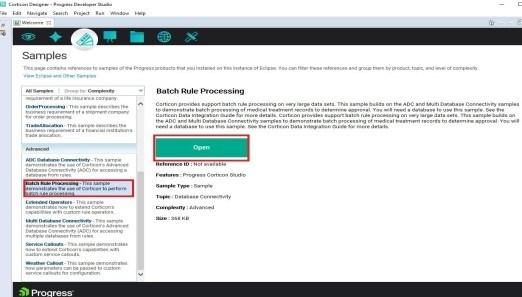
3. Make sure Batch Rule Processing is checked and click OK.

4. Start Corticon Server 5.7 and connect to Corticon Web Console 5.7 in your browser using the default credentials Admin/Admin. The typical address for the Web Console is http://localhost:8850/corticon.
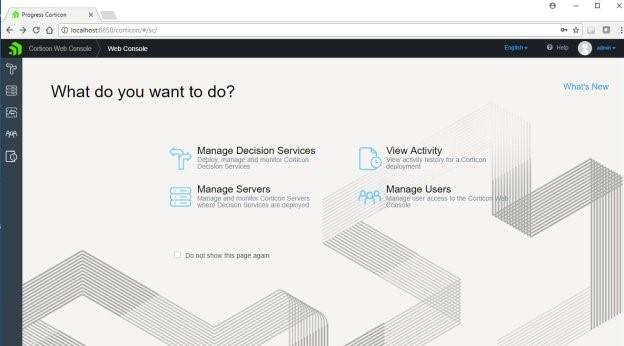
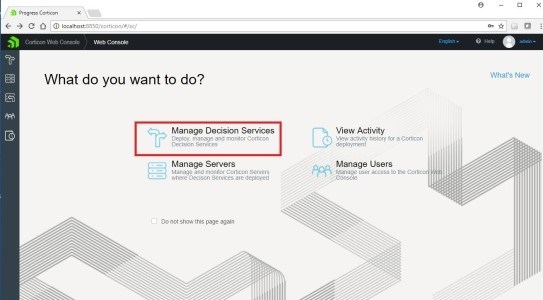
5. Click Manage Decision Services.
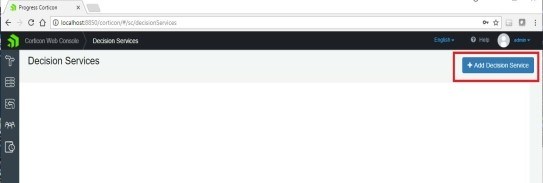
6. Then click the Add Decision Service button.
7. Make sure Add a single Decision Service is selected and click OK.

8. Under Add Decision Service, enter the details:
Name: MyADC_Sample 1.0
Description: Deploys ADC Database Connectivity sample project’s Decision Service
EDS File: navigate to the ProcedureApproval eds file previously created.
Servers: Select the server location.
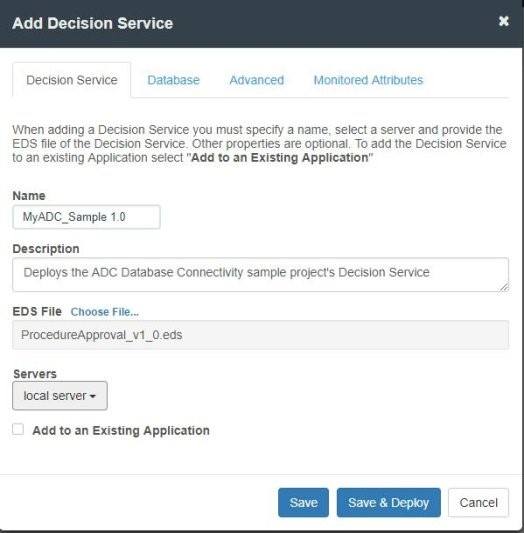
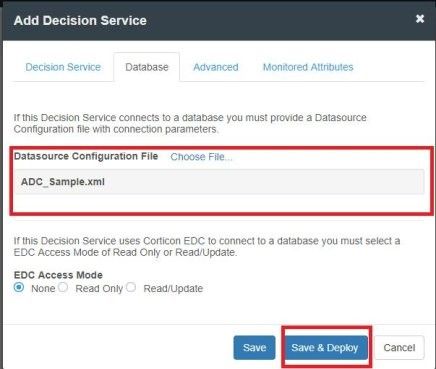
9. Click the Database tab under Add Decision Service, choose the Datasource Configuration File previously exported from Corticon Studio and click Save & Deploy.
10. The Web Console now displays the selected Decision Service.
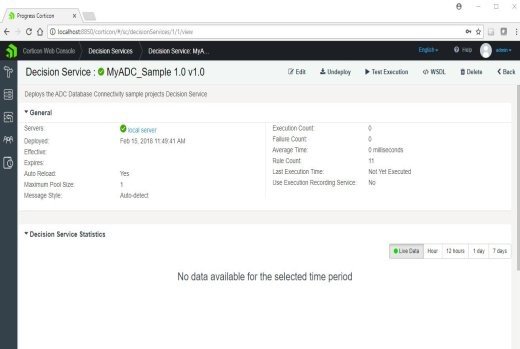
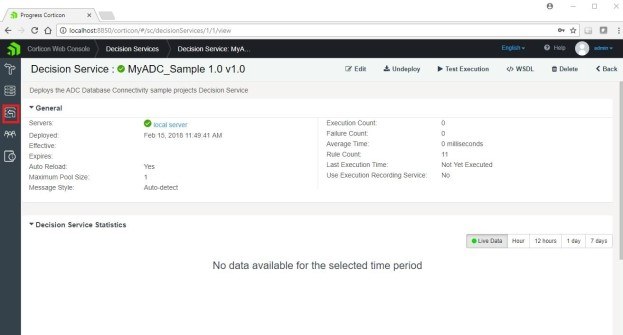
11. Select the Batch Configuration icon on the far left of the Web Console screen.
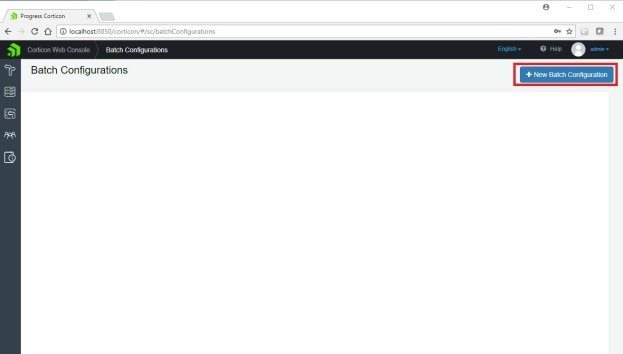
12. Click the New Batch Configuration button.
13. Under New Batch Configuration, enter myADC_Batch for the Batch Configuration Name; choose the MyADC_Sample 1.0 Decision Service; choose the Patient Data Datasource, which is found within the datasource configuration file; and then choose the AllPatients Query. Click Save.

14. The Batch Configuration page displays the new configuration.
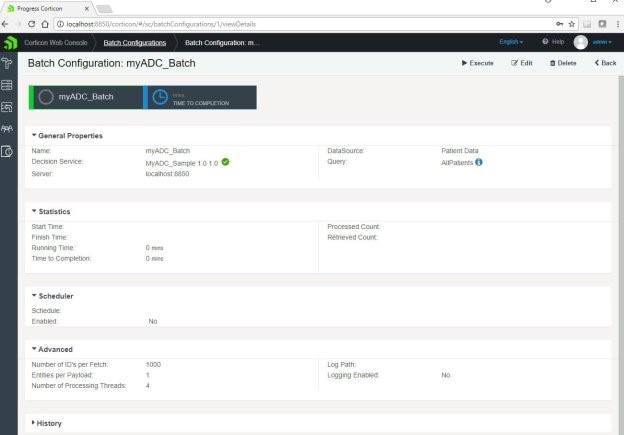
15. Click Execute from the Batch Configuration: myADC_Batch page to run the batch process.
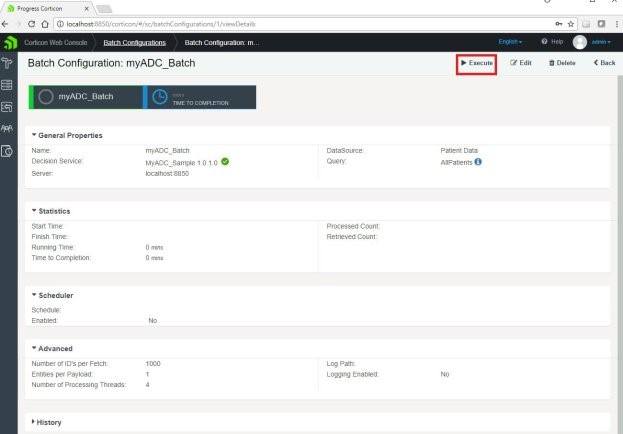
16. After execution, the Process Count should increase on the Batch Configuration: myADC_Batch page.

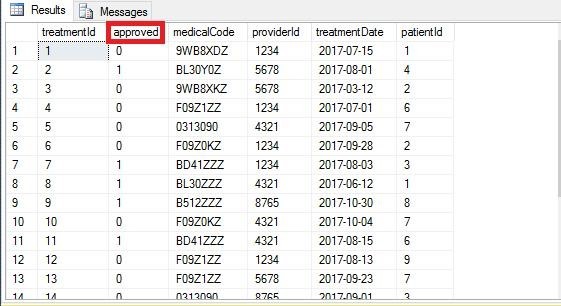
17. To test that the batch ran, look for values in the Approved column in the Treatment table of the PatientRecords Database.
Run a Parameterized Batch Job
You can set your batch configuration with query parameters for more control.
To try it out:
- Follow the steps above to create a batch Configuration and name it MyADC_Batch_regional.
- Select the MyADC_Sample 1.0 Decision Service.
- Choose the Patient Data datasource, which is found within the datasource configuration file.
- Select PatientsByRegion for the query, which will add fields under Query Parameters.
- Enter NE for the region value and click the Save button.

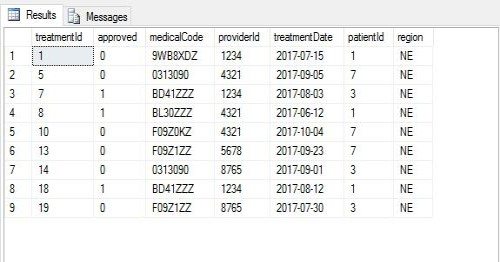
6. Execute the MyADC_Batch_regional job. Only patients from the NE region are processed in the Treatment table of the PatientRecords database.
Run a Large Batch Test
The scripts from the Batch Rule Processing sample can be used to run large amounts of data through a Decision Service at one time. Here's how you can test this out:
1. In the Corticon Studio Project Explorer window, locate the generate_patients script and open it in a database management tool.
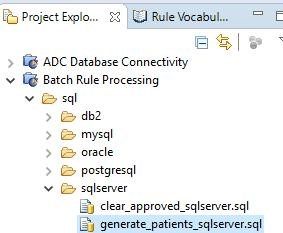
2. Make sure the generate_patients script reflects the information below and execute the script. These settings will determine the number of patients generated and the starting ids for the patients and treatments.
SET @PATIENT_COUNT=1000
SET @FIRST_PATIENT_ID=1000
SET @FIRST_TREATMENT_ID=1000

3. Execute myADC_Batch.

4. Notice the Processed Count increasing.

5. Once the job is done, open the Decision Service page in the Web Console to see the updated counters and charts.
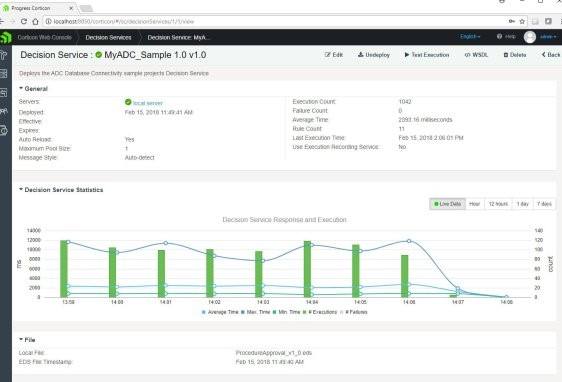
Now you’ve completed the entire process for setting up and running a large batch of data. You can customize this basic process for your own data and take advantage of Corticon’s powerful batch processing capability.
We hope this new feature helps save you time and make your day easier. Don’t forget to take a look at everything that’s new in Corticon 5.7, or if you want to dive right in, feel free to download a trial or schedule a demo today.

