Deploy a Managed Storage Account in Microsoft Azure

Today I will teach you how to create what Microsoft calls a managed storage account. As you may know, each storage account has two interchangeable private keys you can use to authenticate programmatically to the general purpose storage account's four services:
- blob
- file
- table
- queue
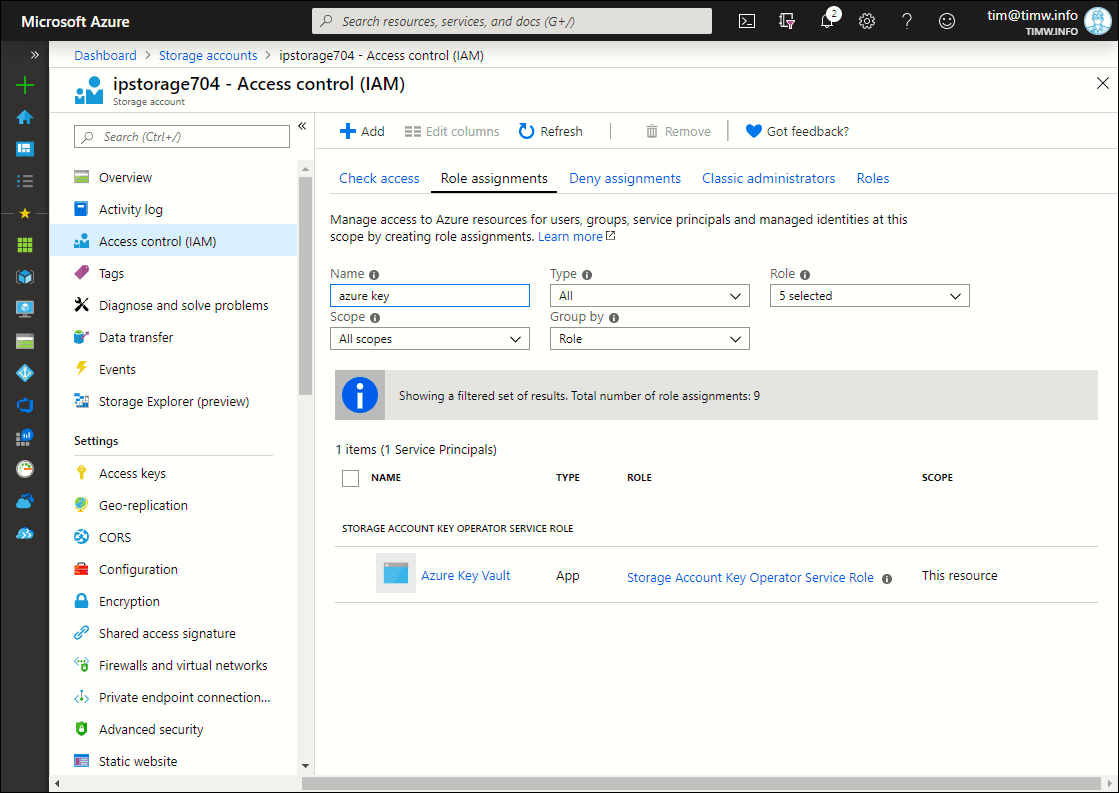
Take a look at my ipstorage704 general purpose v2 storage account shown in Figure 1. Specifically, this is an unmanaged storage account, which means that we and not Azure manage those two private keys.

Figure 1. An unmanaged Azure storage account.
If you forget to regenerate and rotate the keys, or worse, you leave plaintext keys in your source code, then you are quite literally asking for an Azure data security compromise.
So what is a managed storage account?
A managed storage account is a general-purpose storage account whose security is managed by Azure. This means we will accomplish the following goals:
- store the two access keys in an Azure Key Vault
- instruct Azure to periodically regenerate the keys
To set up your Azure environment for this exercise, you'll need to perform the following three tasks:
- Create a general purpose v2 storage account (or designate an existing one for use here)
- Deploy an Azure Key Vault resource
- Install Azure PowerShell on your administrative workstation
Yes, we need to define a managed storage account programmatically with Azure PowerShell or Azure command-line interface (CLI) because this feature is currently unavailable in the Azure portal. I've borrowed the code from the Microsoft Azure docs article entitled "Manage storage account keys with Key Vault and Azure PowerShell." Let's get to work!
Set up the Azure PowerShell Environment
Go ahead and fire up an elevated PowerShell console or Visual Studio Code instance and authenticate to your Azure subscription:
Connect-AzAccount
If you have more than one Azure subscription, you'll need to specify your default context:
Set-AzContext -SubscriptionName 'MySub'
Next, let's define some variables simplify storage account and key vault references. Note that you'll need to substitute my values for your own:
$resourceGroupName = "ipswitch"

$storageAccountName = "ipstorage704"

$storageAccountKey = "aUQBMQFMnnk2fBNsv2K49mqW31Vc0nHjMDGJm4HAZId+5PgBYfKbrZMippBaTGjlGOsg+EovpVYKwhBCIT0eSA=="

$keyVaultName = "ipswitch-keyvault"

$keyVaultSpAppId = "cfa8b339-82a2-471a-a3c9-0fc0be7a4093"
Some notes concerning the preceding code:
- You can fetch the storage account key in the Azure portal from the storage account's Access keys blade (see Figure 1). It doesn't matter whether you use key 1 or key 2
- The Azure Key Vault's application ID is fixed and Microsoft-provided. For the Azure public cloud, use the above value. For other clouds, see the Azure docs
We also need to fetch our user ID as well as reference the target storage account:
$userId = (Get-AzContext).Account.Id

$storageAccount = Get-AzStorageAccount -ResourceGroupName $resourceGroupName -StorageAccountName $storageAccountName
All Key Vault to Manage the Storage Account Keys
In the name of least-privilege access, let's assign the Azure role-based access control (RBAC) role "Storage Account Key Operator Service Role" to our Key Vault. Doing so ensures that Key Vault can manage only storage account keys and no other Key Vault secret or resource:
New-AzRoleAssignment -ApplicationId $keyVaultSpAppId -RoleDefinitionName 'Storage Account Key Operator Service Role' -Scope $storageAccount.Id
Check out Figure 2, where you can see that my Key Vault has the appropriate RBAC role assignment for my storage account.

Figure 2. My Key Vault can access my storage account.
You may know already that Azure Key Vault uses access policies to grant users or service principals specific permissions on Azure Key Vault secrets. We need to grant our user ID these permissions:
Set-AzKeyVaultAccessPolicy -VaultName $keyVaultName -UserPrincipalName $userId -PermissionsToStorage get, list, delete, set, update, regeneratekey, getsas, listsas, deletesas, setsas, recover, backup, restore, purge
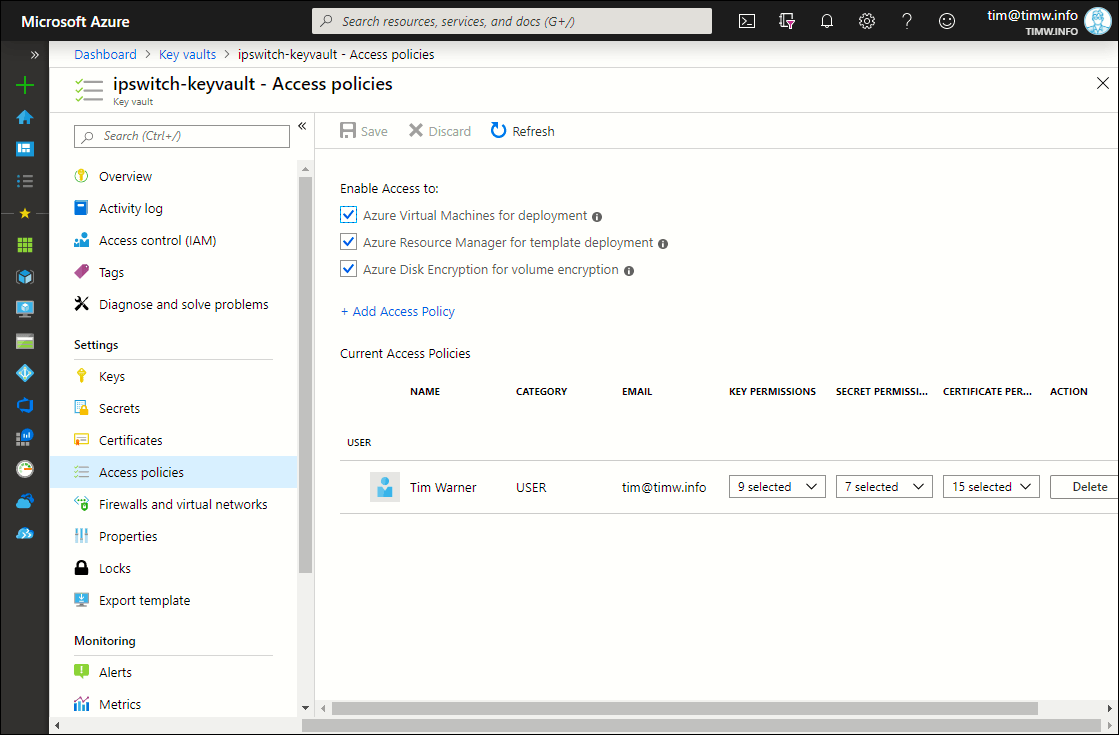
I show you the Azure portal's view of my Key Vault access permissions in Figure 3.

Figure 3. My user account has full control over Key Vault secrets.
Complete the Configuration
Finally, we'll add the target storage account to the Key Vault's list of managed storage accounts:
Add-AzKeyVaultManagedStorageAccount -VaultName $keyVaultName -AccountName $storageAccountName -AccountResourceId $storageAccount.Id -ActiveKeyName 'key1' -DisableAutoRegenerateKey
Some notes about the preceding code:
- Notice that the value of the ActiveKeyName parameter is the string name of the key, not the value itself. These values are 'key1' or 'key2'
- The DisableAutoRegenerateKey switch parameter instructs Key Vault not to periodically regenerate your keys.
If you want to configure Key Vault to use, say, a 90-day regeneration period, then you could first set a variable:
$regenerationPeriod = [System.Timespan]::FromDays(90)
And then substitute the following parameter/value pair instead of the -DisableAutoRegenerateKey switch:
-RegenerationPeriod $regenerationPeriod
If Something Bad Happens, Use Plan B
You may receive a "Bad Request" error when running Add-AzKeyVaultManagedStorageAccount. This is a known issue for which at least one GitHub bug report exists.
If you do receive this error, all is not lost. Simply open Azure Cloud Shell, authenticate to your subscription, and run the following Azure CLI command, substituting your resource names and ID:
az keyvault storage add --vault-name ipswitch-keyvault -n ipstorage704 --active-key-name key1 --auto-regenerate-key --regeneration-period P90D --resource-id "/subscriptions/2fbf906e-1101-4bc0-b64f-adc44e462fff/resourceGroups/ipswitch/providers/Microsoft.Storage/storageAccounts/ipstorage704"
The preceding code completed successfully on my system. Note that here we specify a 90-day key regeneration period.
Trust, But Verify
Sadly, the Azure portal displays absolutely no information regarding our managed storage account either in the Key Vault or the storage account. However, we can run Get-AzKeyVaultManagedStorageAccount to perform verification:
Get-AzKeyVaultManagedStorageAccount -VaultName 'ipswitch-keyvault' -Name 'ipstorage704'

Id                  : https://ipswitch-keyvault.vault.azure.net:443/storage/ipstorage704

Vault Name          : ipswitch-keyvault

AccountName         : ipstorage704

Account Resource Id : /subscriptions/2fbf906e-1101-4bc0-b64f-adc44e462fff/resourceGroups/ipswitch/providers/Microsoft.Storage/
storageAccounts/ipstorage704

Active Key Name     : key1

Auto Regenerate Key : True

Regeneration Period : 90.00:00:00

Enabled             : True

Created             : 9/30/19 8:25:18 PM

Updated             : 9/30/19 8:25:18 PM

Tags                :
There you have it! The procedure for creating a managed storage account is pretty darned clunky, but the benefit of your not having to manually administer storage account access keys makes this configuration very attractive regardless of the hassle.

