In today’s world, it’s not enough just to have web applications with business use cases implemented—your app needs a great UI as well. A successful UI focuses on helping the user accomplish a given task in a simple and efficient manner. An attractive and intuitive look and feel is undeniably at the core of an effective UI.
Your business needs are also not limited to desktop devices. Developers may want to design applications once and expect them to serve their end users’ needs on all types of devices, including tablets and smartphones. Displaying your data in tabular format (grid) is not going to be effective in all devices and form factors. Moreover, end user operations on mobile devices should be limited to simple tasks. So rendering advanced widgets to display data on mobile devices will not make for a great user experience.
When you develop an application using Rollbase, the platform is smart enough to render data differently on different devices. Using Rollbase, you can create a user interface component called a Card to display Rollbase records without writing a single line of code. In this blog, you will learn how to create cards with Rollbase for your user interface requirements.
What Are Cards?
Cards are widgets that are used to display object record data based on your business needs. You can add a drill down link to a card to view record details page.
Rollbase supports two types of cards:
- Vertical (default), which are preferred for mobile devices.
- Horizontal cards, which have a fixed height and width suitable for desktop and large screen devices. You can also use horizontal cards on tablets.
A card can only be used to replace a record list page where we display object records in a tabular format. If there are multiple objects in your application, you have to create a different card for each list view page. You can create as many cards as you want, and then a preferred card per device.
As an adaptive design, Rollbase renders a default card in tablets and smartphones for a record list view page. Default cards include the record name with a drill down icon through which we can view record details. Rollbase renders a grid by default on desktop devices, but you can create cards for desktop devices and save them. Follow the steps in the next section to learn how to create cards in Rollbase.
How to Create Cards
Only administrators can create cards, assign them to appropriate devices, and save them from Live Preview. Follow these steps to create a new card:
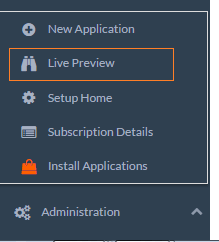
1) Launching Live Preview
Go to Live Preview from the Rollbase menu. This is in the Administration section if you use the Modern – Vertical Menus UI blueprint.
2) Launching Card Editor
Launch the card editor from the Card Templates section. You might find more than one list if you have more than one section in the same page and each section contains a different list view.
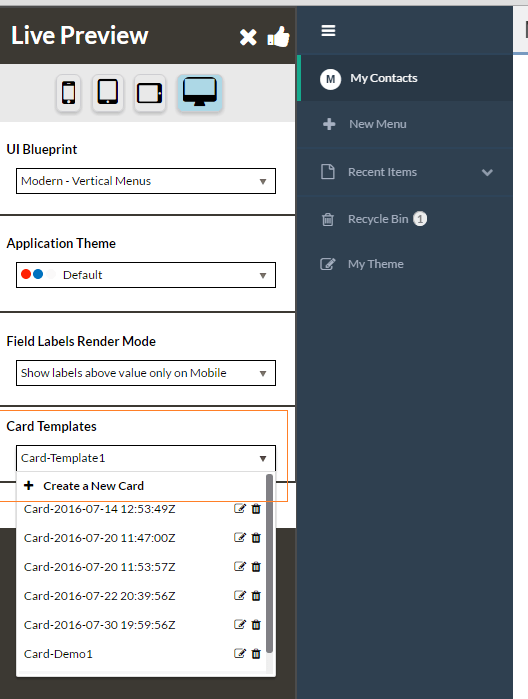
3) Select Design of Card
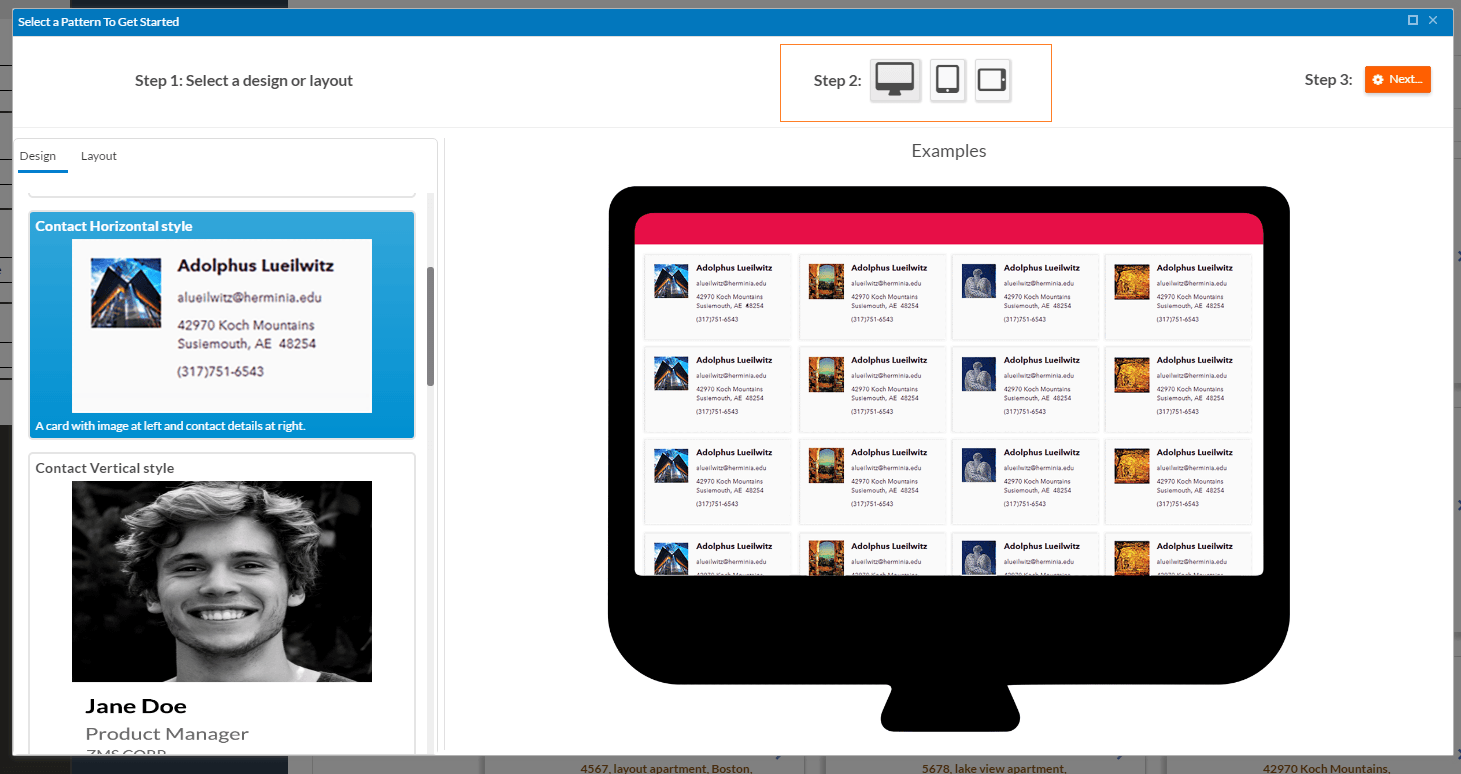
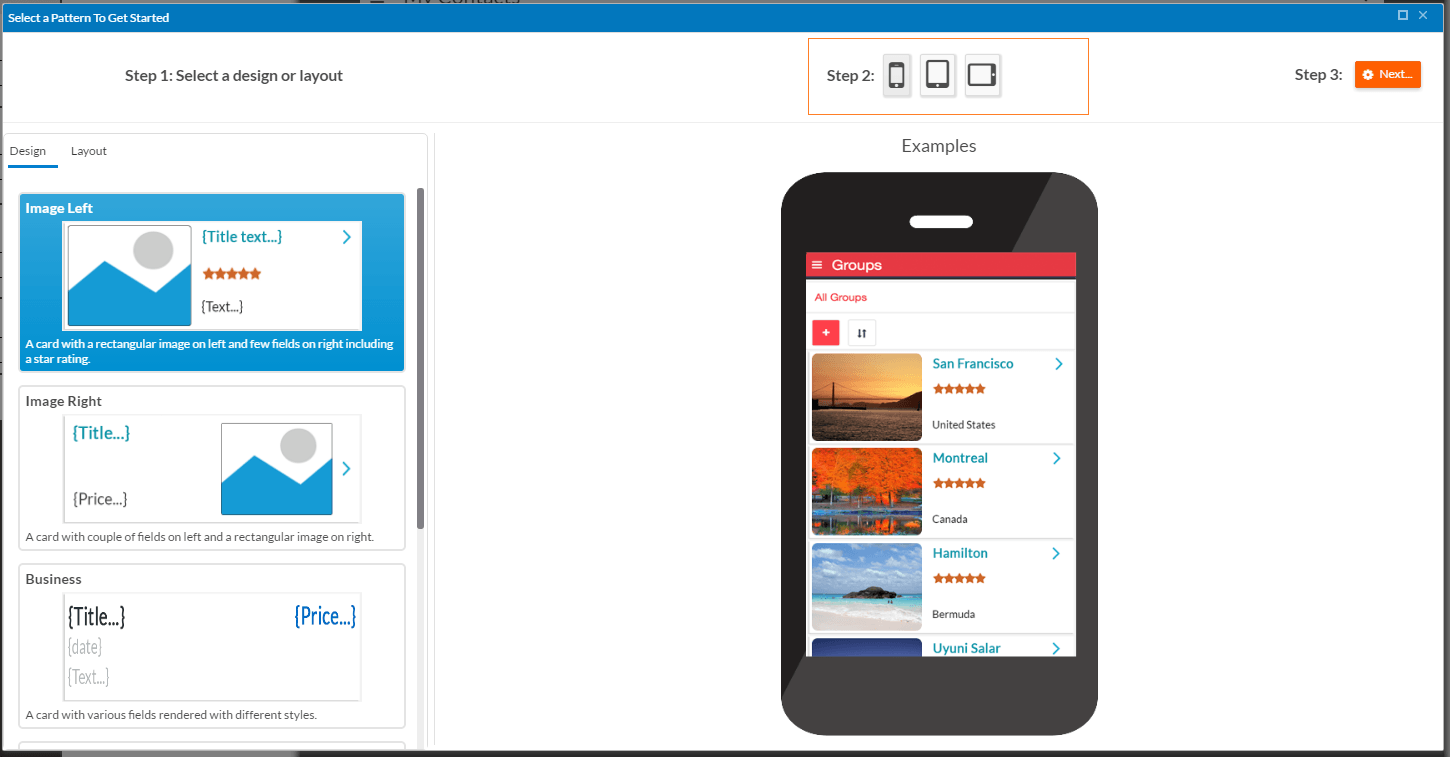
Choose a design from the list to see a preview in the right pane. Designs are predesigned cards; you map Rollbase fields to create a card from a design. You can switch between different devices and see a preview for each type of device. The available designs and layouts are different for vertical and horizontal cards. Once you decide which design to use, select it and click Next. If none of our card designs meet your requirements, you can create a card using our layouts—just select a layout and add fields from editor.
The screens below show sample horizontal and vertical card designs:
Horizontal Design
Vertical Design:
4) Map Rollbase Object fields to Card
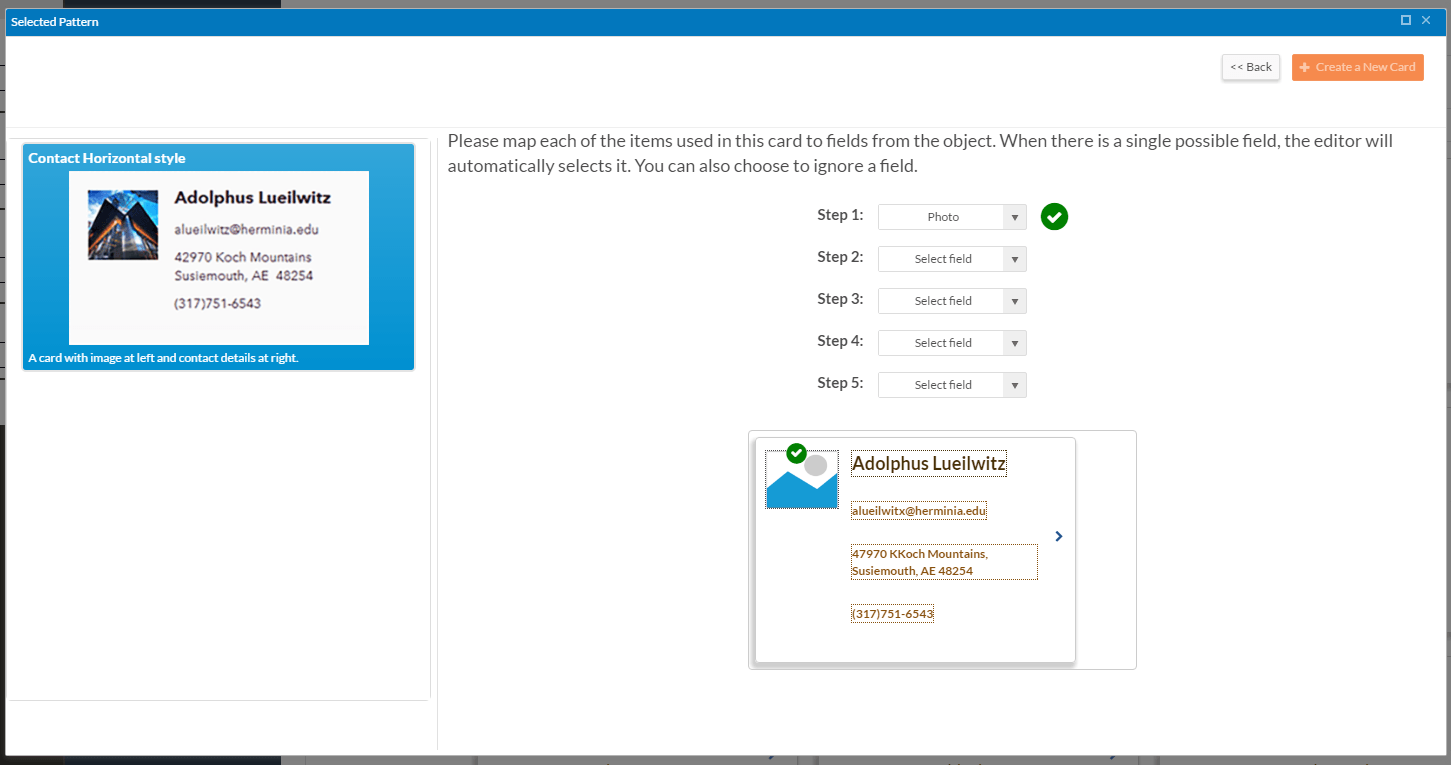
Map Rollbase fields to your card. If you would like to remove an item from the card, map to the Ignore Field option. Once you map all fields, click Create a New Card. The screen below shows the interface for mapping fields:
5) Design Card from Editor
Rollbase provides a WYSIWYG card editor, where you can change your card layout and/or styles. In addition to the card editor, Rollbase has built-in tools that allow you to add some on-the-fly components to cards via simple mapping. You can add more field values or labels to cards by dragging and dropping the field value or label to the current cursor position from the Values or Labels sections.
The screen below shows the built-in tools:
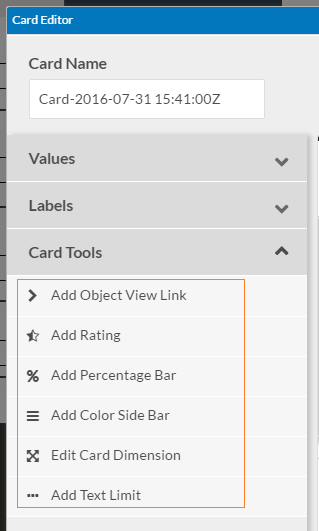
These built-in tools include the following:
- Add Object View Link—Adds a drill down icon to your card; users can click this icon to navigate to the record view page.
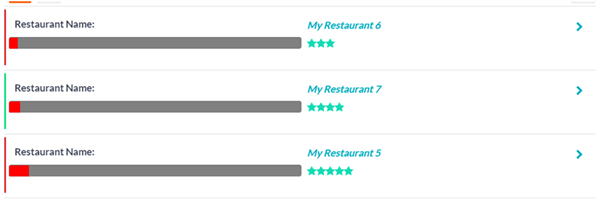
- Add Rating—Lets you add a rating component to your card. You can map integer, decimal, or formula fields that have a return type of integer or decimal to a rating component. Rollbase renders a rating based on the field value, which can have a range of values from 1 to 10. If you map a decimal field, and the precision value of your decimal fields is greater than or equal to 0.5, Rollbase renders a half rating.
- Add Percentage Bar—Adds a percentage bar to your card. For instance, you could use this widget to display a student’s grade percentage. This widget also accepts integer, decimal, and formula fields that have a return type of integer or decimal. Accepted values are from 1 – 100.
- Add Color Side Bar—This tool lets you add a conditional color side bar to your card based on a Boolean value. It accepts only Boolean values, so you can choose any checkbox field or formula field that have a return type of Boolean. You can select a color for a true value and a color for a false value.
- Edit Card Dimension—Lets you adjust your card’s width and height. Different widths can be provided for desktop and tablet devices. This tool is only available for horizontal cards.
- Add Text Limit—Limit long text inside the card, for example, if you have a long description in one field and you want to show only the first three lines of text. You can choose either number of lines to see or the number of characters to see. Based on the device and the size of your card, Rollbase automatically trims the text and adds an ellipsis to it.
The screen below shows a card created by using the built-in tools:
Once you complete editing your card, you can select Use this card for to select devices on which to use your card. Name your card and click Save.
6) Saving Card per Device
The next step is to select your card for different devices by selecting the device icon from Live Preview. You can attach only one card per device type for the list view, so if you have more than one card per device, you should select them and save it from Live Preview.
The screen below highlights device selection and the save button:

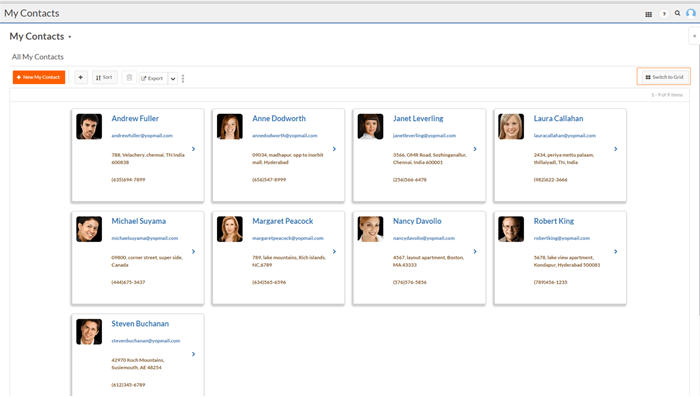
Now you will see a card rendered instead of the default grid. You can always switch to the grid view by clicking Switch to Grid on the toolbar.
The following screen shows a card with a horizontal design on a desktop and highlights the Switch to Grid button:
Create Cards without Code
In this blog you learned how to create Cards without writing a single line of code. The Rollbase platform gives you lots of flexibility to render your object data with nice UI components. If you'd like to give it a try for yourself, sign up to give Rollbase a try.


