How to Add the Visual Studio MVC Features for a Sitefinity Project

The content you're reading is getting on in years.
This post is on the older side and its content may be out of date.
Be sure to visit our blogs homepage for our latest news, updates and information.

Obi-Wan Kenobi: You are now an MVC project
Visual Studio: I am now an MVC project
Introduction
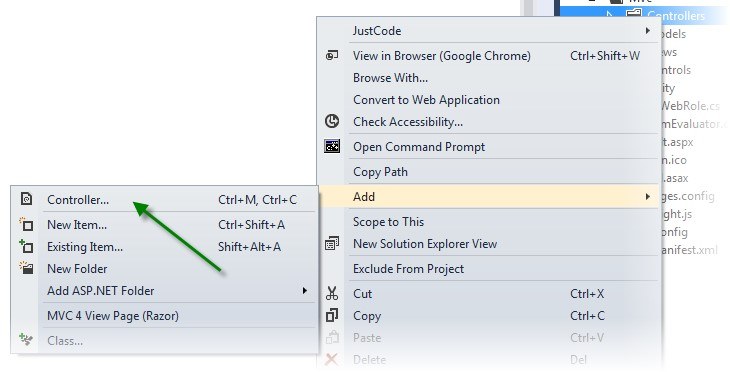
You have been developing on ASP.NET for quite some time and you are used to the native features offered by Visual Studio, like for instance when you are adding a Controller, adding a View or just using ASP.NET MVC scaffolding. Now you are doing MVC development within Sitefinity CMS, but you don’t find those tools in there. Does this seem to be your case?
If the answer is yes, then this blog post has been created for developers just like you! In the following paragraphs, I am going to show you how to modify a Sitefinity project and enable all the nice productivity tools natively available in Visual Studio for ASP.NET MVC web applications.
A Little Background
Sitefinity has been created as a very flexible ASP.NET WebForms application. By design it uses a lot of programming principles and technologies used widely in the implementation of ASP.NET MVC. I am talking about the ASP.NET routing engine, separation of concerns, unobtrusive client side validation and other things such as wide usage of MVVM programming pattern for the backend components. That allowed the engineers to almost seamlessly add native support for ASP.NET MVC in Sitefinity. But still, Sitefinity remains a WebForms application which means that within Visual Studio developers cannot access the typical MVC tools such as “Add View/Add Controller”. With the introduction of Sitefinity Thunder, developers were given a really rapid development productivity tool and creating MVC widgets was one of the many features available there, so whatever your profile is (MVC or WebForms), you should definitely check the tool out (link here).
The Solution
In essence, allowing the MVC features in Visual Studio is as simple as editing the project file. Each project file has a collection of ProjectType Guids, which defines the type of project, so that Visual Studio can load all the appropriate tools for such a project.
You can edit the project type and thus give Visual Studio no other choice, but to provide you with all the MVC tools, which is quite nice. To do so, you need to follow a very easy three steps process:
1. Unload your Sitefinity project in Visual Studio
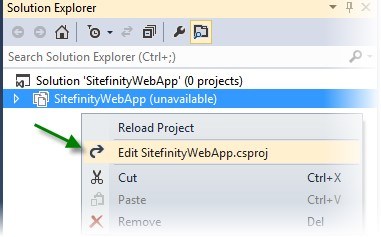
Open your Sitefinity project in Visual Studio and right click on the SitefinityWebApp project. Then simply click on the Unload Project option

2. Edit the project file
Right click on the unloaded project and just click on the Edit SitefinityWebApp.csproj option, which will open the project file in the XML editor.

3. Add the MVC project type
In the XML of the file, Navigate to the ProjectTypeGuids node and add the Guid for the right version of ASP.NET MVC. In my case I am using ASP.NET MVC 4, which is the currently supported version {E3E379DF-F4C6-4180-9B81-6769533ABE47}
<ProjectTypeGuids>{E3E379DF-F4C6-4180-9B81-6769533ABE47};{349c5851-65df-11da-9384-00065b846f21};{fae04ec0-301f-11d3-bf4b-00c04f79efbc}</ProjectTypeGuids>Success
That's it! Now you can crack the code of what you’re doing and save yourself a lot of time during development. Happy coding and may the source be with you!

