How to add browse and edit functionality to custom controls and modules

The content you're reading is getting on in years.
This post is on the older side and its content may be out of date.
Be sure to visit our blogs homepage for our latest news, updates and information.
If you want to allow your editors to edit some already published content without having them go to Sitefinity backend and edit widget or content item you can use Sitefinity built in Browse and Edit functionality.

Here I will describe how to implement it in your custom widgets or modules.
To use this functionality you need to implement IBrowseAndEditable interface.
1. In your widget code file or your module code file that manages the correct frontend view(MasterView or DetailsView) implement IBrowseAndEditable
public class ProductDetailsView : ViewBase, IBrowseAndEditableAdd the interace implementation
//Adds browse and edit commands to be executed by the toolbar public void AddCommands(IList<BrowseAndEditCommand> commands) { this.commands.AddRange(commands); } // Represents the browse and edit toolbar for the control public BrowseAndEditToolbar BrowseAndEditToolbar { get { if (this.browseAndEditToolbar == null) { this.browseAndEditToolbar = this.Container.GetControl<BrowseAndEditToolbar>("browseAndEditToolbar", true); } return this.browseAndEditToolbar; } } BrowseAndEditToolbar IBrowseAndEditable.BrowseAndEditToolbar { get { return this.BrowseAndEditToolbar; } } //Gets the information needed to configure this instance. [PersistenceMode(PersistenceMode.InnerProperty)] public BrowseAndEditableInfo BrowseAndEditableInfo { get; set; }private BrowseAndEditToolbar browseAndEditToolbar;private List<BrowseAndEditCommand> commands = new List<BrowseAndEditCommand>();In InitializeControls method add
if (SystemManager.IsBrowseAndEditMode) { this.SetDefaultBrowseAndEditCommands(); this.BrowseAndEditToolbar.Commands.AddRange(this.commands); var bem = BrowseAndEditManager.GetCurrent(this.Page); if (bem != null) { bem.Add(this.BrowseAndEditToolbar); } }
The last step is to add BrowseAndEdit toolbar control to your template
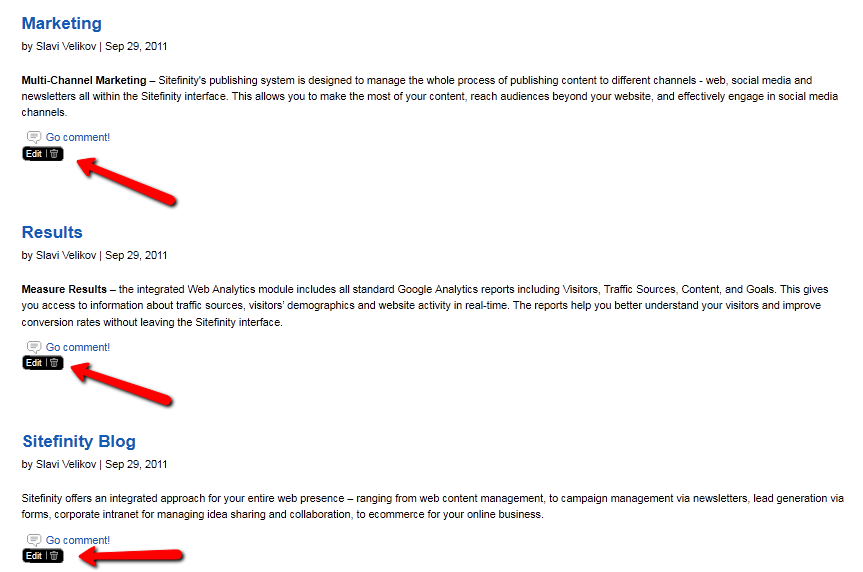
<%@ Register TagPrefix="sf" Namespace="Telerik.Sitefinity.Web.UI.PublicControls.BrowseAndEdit" Assembly="Telerik.Sitefinity" %><sf:BrowseAndEditToolbar ID="browseAndEditToolbar" runat="server" Mode="Edit"></sf:BrowseAndEditToolbar>When you activate browse and edit functionality on the frontend of your site you will see the edit button where your widget is placed and editing it will take you to the widget designer or module item edit view.

