Integrate Cloud Data Sources Into Your Alteryx Application

Looking to easily integrate all your cloud data sources into Alteryx? Learn how in this simple tutorial using Progress DataDirect.
Alteryx allows organizations to easily prepare, blend, and analyze data. In order to make the most out of this application’s capabilities you will want to be able to connect Alteryx to all of your SaaS applications.
DataDirect Cloud provides the perfect tool for Alteryx data objects for analysis. It supports the ODBC standard used by Alteryx to input data sources for instant access by data artisans. The user can expose data in real time through an ANSO SQL interface, similar to that of SQL Server or Oracle, due to the growing list of ODBC SaaS connectors—including APIs for Salesforce, Eloqua, Marketo, Hubspot, Force.com and Rollbase. They can then import data in a standard way from Alteryx via tables, Visual Query Builder, or SQL Editor.
Update: Note that this is an update to Sumit's original tutorial. Some users had run into an error which we address in step 8 (they had used their DataDirect Cloud user name in the ODBC DSN and gotten an error in Alteryx because they didn't leave the user name blank when connecting).
Getting Started
- Sign up and log-in to your DataDirect Cloud account.
- In DataDirect Cloud, Click on the “DataSources” tab and create your connection to the cloud datasource of your choosing. We have connectivity to Marketo, Eloqua, Salesforce, Oracle Service Cloud, and more! I have chosen to connect to Marketo in this tutorial.
- Download the DataDirect Cloud ODBC driver by clicking on the “Downloads” link and selecting your operating system. (Note: If using a 32bit Alteryx application you will have to download a 32bit ODBC driver and if using a 64bit application you will have to download the 64bit driver)
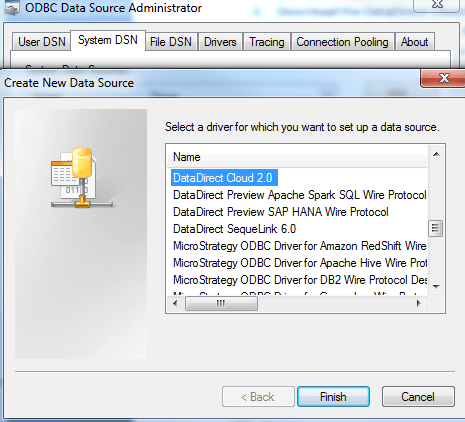
- After installing the DataDirect Cloud ODBC driver, configure your ODBC DSN by opening the ODBC Administrator > clicking Add > and selecting DataDirect Cloud 2.0
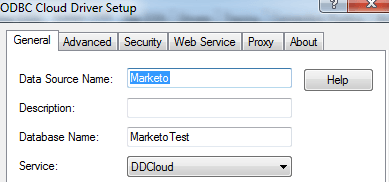
- Enter the name of your DataSource from DataDirect Cloud (my connection to Marketo is named MarketoTest) in the “Database” field.
- Launch the Alteryx Designer.
- Select In/Out tab and drag “Input Data” icon into the designer pane.
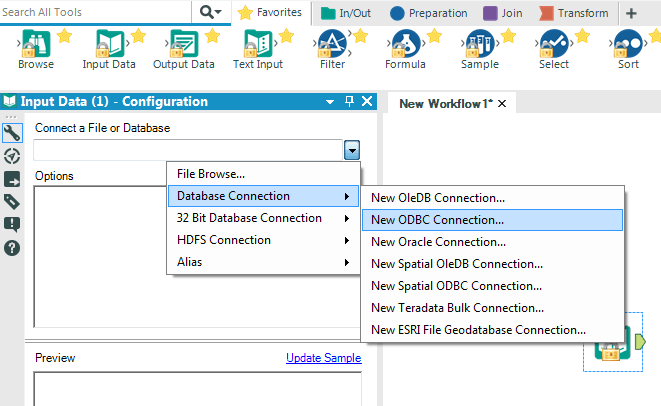
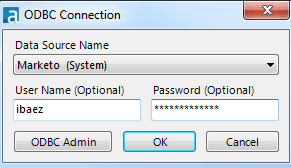
- Select the System ODBC data source that we created in steps 4 and 5. Enter your DataDirect Cloud credentials to log into the Data Source. (Note: If you entered your DataDirect Cloud username in the “Security” tab of the ODBC DSN, you must leave the User Name field in Alteryx blank)
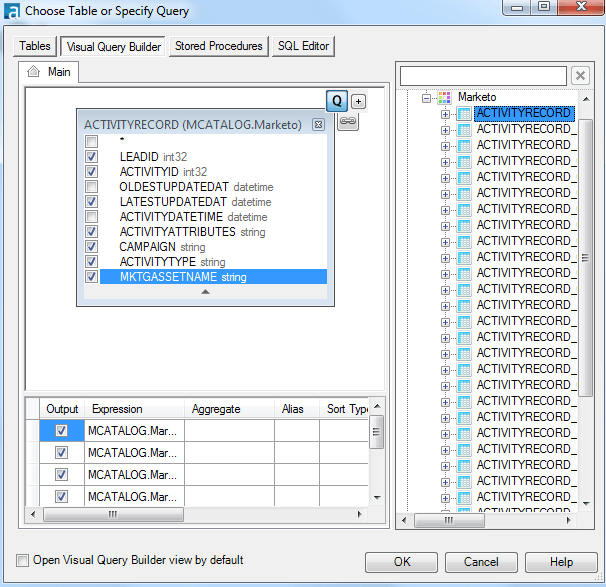
- Navigate to the table you want to import or use the SQL Editor to write a SQL statement.
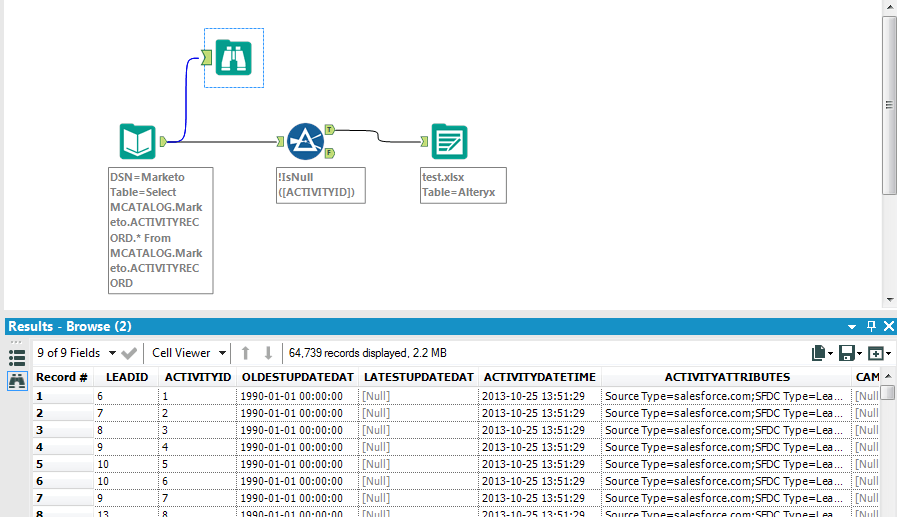
- You can now create or add filters, joins, transformations and other preparation options to your workflow that can be stored in a number of popular formats! In the workflow I created, I used a Browse to display my table, a filter to narrow down what I wanted to export, and then I output my data to an Excel spreadsheet. What does your data flow look like?
Load Unlimited Data Into Alteryx Today
Try a free trial of DataDirect Cloud and load data from any ODBC source into Alteryx. Contact sales to speak to one of our systems engineers about ODBC data connectivity to SaaS, big data SQL, NoSQL and more.

