JDBC TUTORIAL
Connect to Salesforce from AWS Glue Connectors
Updated: 24 Jul 2024
Introduction
AWS Glue is an Extract, Transform, Load (ETL) service available as part of Amazon’s hosted web services. Glue is intended to make it easy for users to connect their data in a variety of data stores, edit and clean the data as needed, and load the data into an AWS-provisioned store for a unified view.
You can connect to various data sources easily from AWS Glue using the Progress DataDirect Cloud Connectors that are available in the marketplace. To help you get started, in this tutorial we will walk you through on how you can connect to Salesforce using Progress Cloud Connector for Salesforce. Although this tutorial is for Salesforce, the same steps apply for any Progress Cloud Connector available in AWS marketplace.
You can connect to various data sources easily from AWS Glue using the Progress DataDirect Cloud Connectors that are available in the marketplace. To help you get started, in this tutorial we will walk you through on how you can connect to Salesforce using Progress Cloud Connector for Salesforce. Although this tutorial is for Salesforce, the same steps apply for any Progress Cloud Connector available in AWS marketplace.
You can subscribe to Salesforce connector on AWS marketplace here AWS Marketplace: Cloud Connector for Salesforce.
Activate the Connector
- After you subscribe, on the Launch page in the AWS marketplace, you need to activate the connector.
- Click on Usage Instructions and that will show you a pop up to activate the connector as shown below.
- Click on Activate this connector in AWS Glue Studio to launch the connector and create the connection.

Create Connection to Your Salesforce Account
- You should now be in the connection creation page in AWS Glue Studio as shown below.
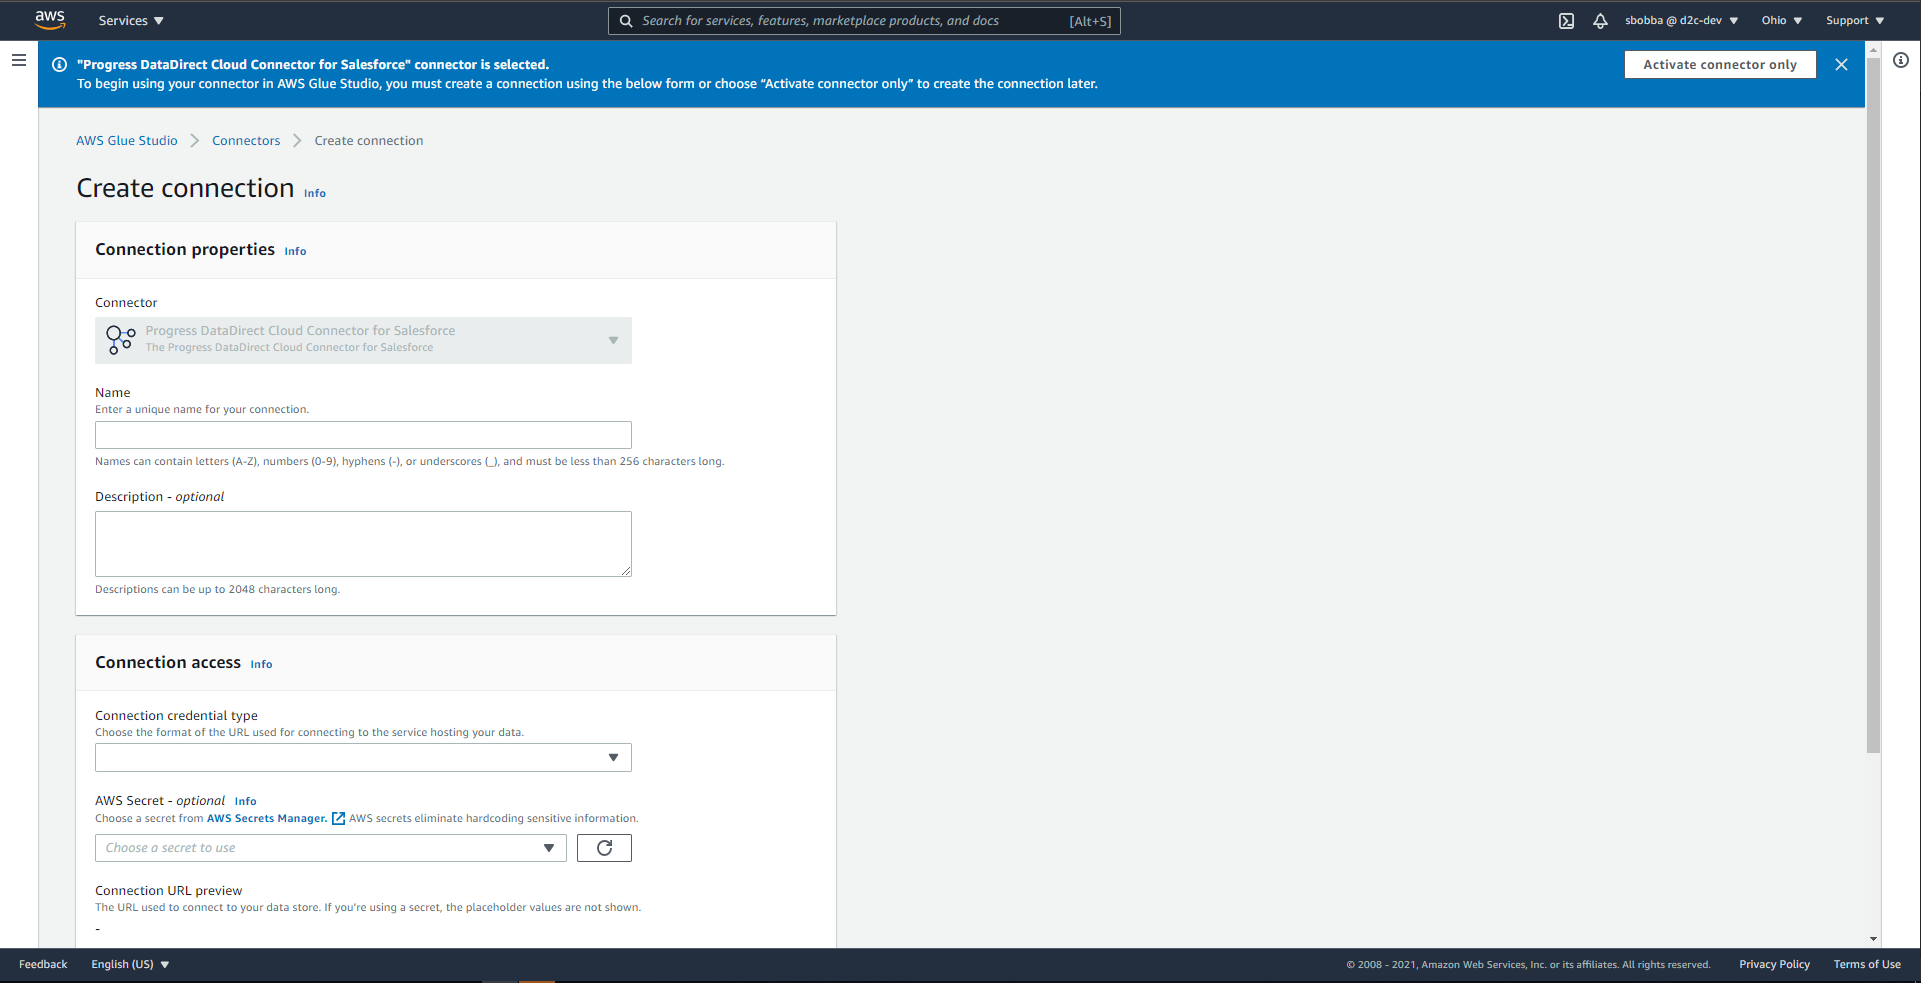
- Provide Name for your connection and choose Connection Credential type between Username_Password and Username_Password_SecurityToken based on your requirement to connect to your Salesforce account.
- Based on your selection, you need to provide credentials as shown below.
Note: It is recommended to use the AWS Secrets Manager to store these credentials and use them here directly. When you create the AWS Secret, make sure the keys have the same case as in JDBC URL specified in the connector.

- Next, click on Create connection and Activate the connector to save this connection.
Create IAM Role
Make sure you create an IAM role with below permissions before you create the AWS job.
- SecretsManagerReadWrite (If you use Secret Manager to store credentials)
- AmazonS3FullAccess
- AmazonEC2ContainerRegistryReadOnly
- AWSGlueServiceRole
Create and Run Job
- Go to AWS Glue Studio and navigate to Jobs.
- On the Create Job section, Select your source as “Progress DataDirect Cloud Connector for Salesforce” and target as S3.

- On the next screen, you should now see a visual flow of the Job, which AWS has created. To keep the tutorial simple, we removed the transform step in the flow by selecting and deleting it.
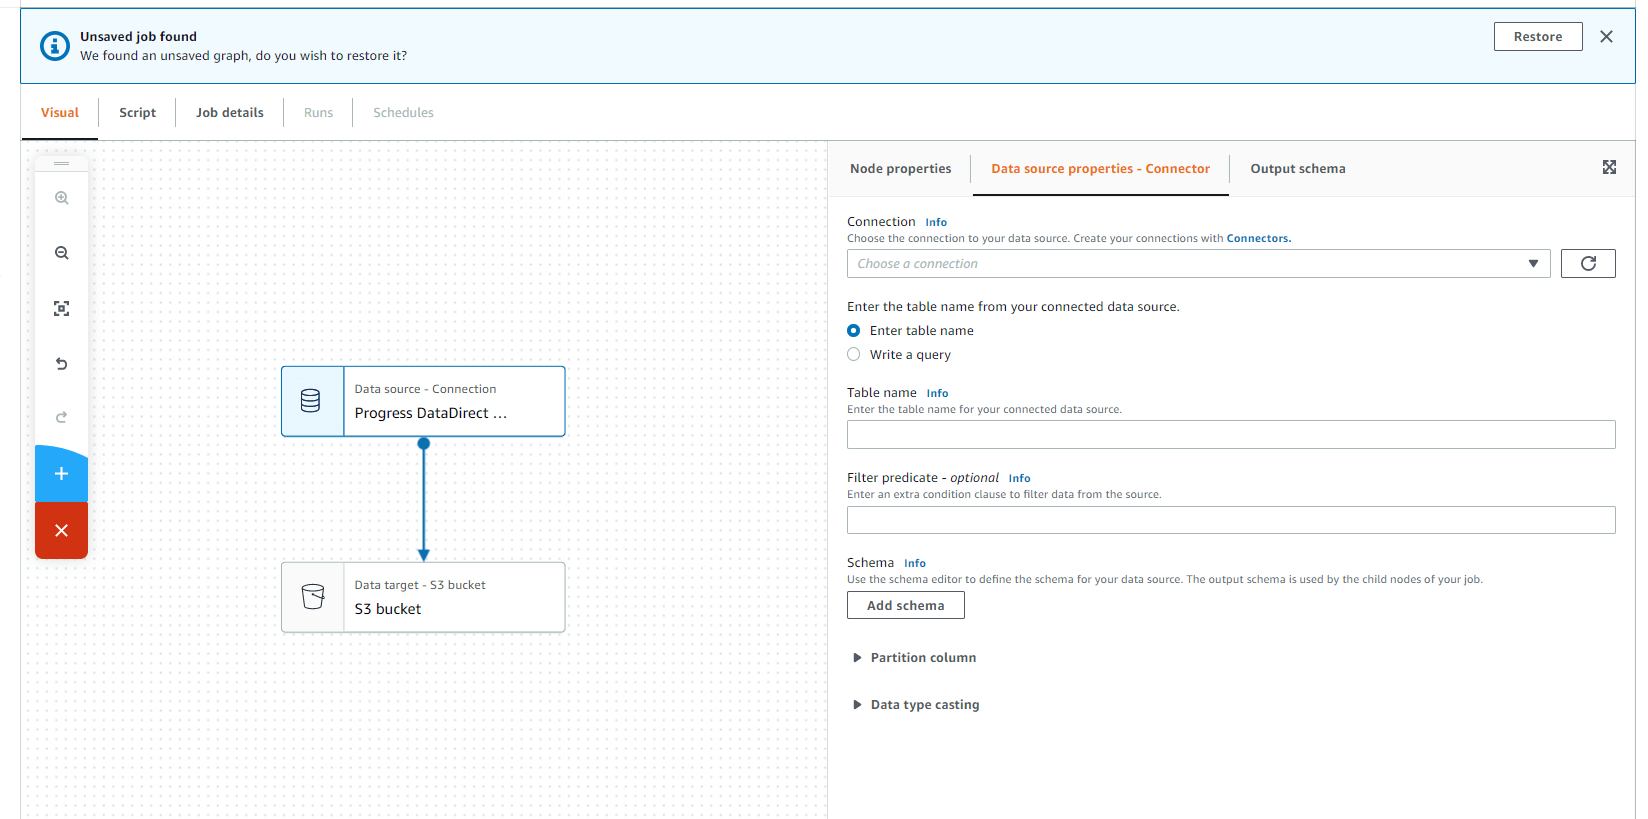
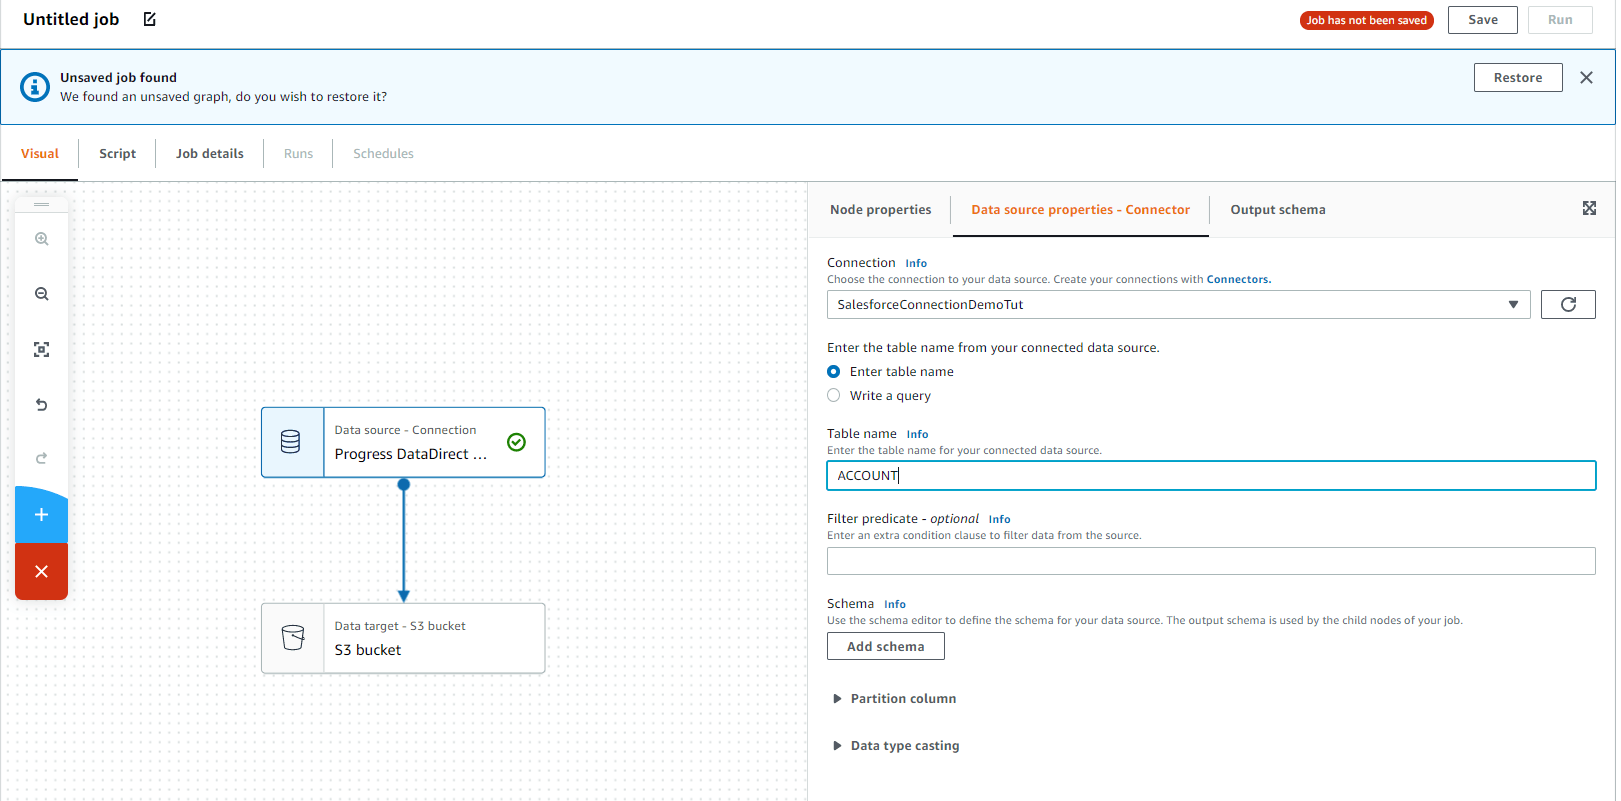
- Click on the DataSource and go to Data source properties – Connector tab. Choose the connection you just created for Salesforce and provide the table name you want to read from Salesforce as shown below. You can also provide a SQL query instead of the table name if you prefer it that way.
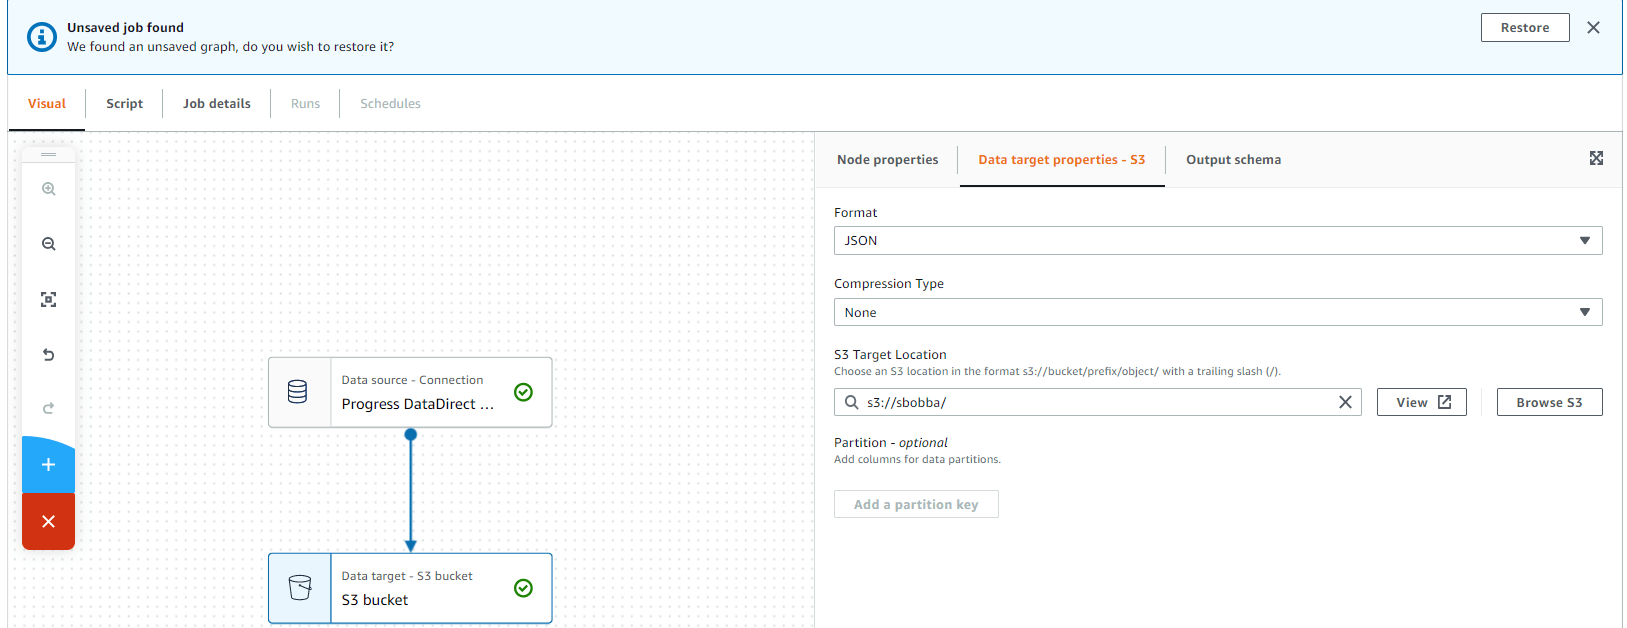
- Choose Data Target – S3 bucket and go to tab Data Target properties – S3 and select the format you want the data to be stored and the location where you want this file to be stored in S3.
- Now go to Job Details and Provide a name and choose the IAM role you created in the previous section as shown below.
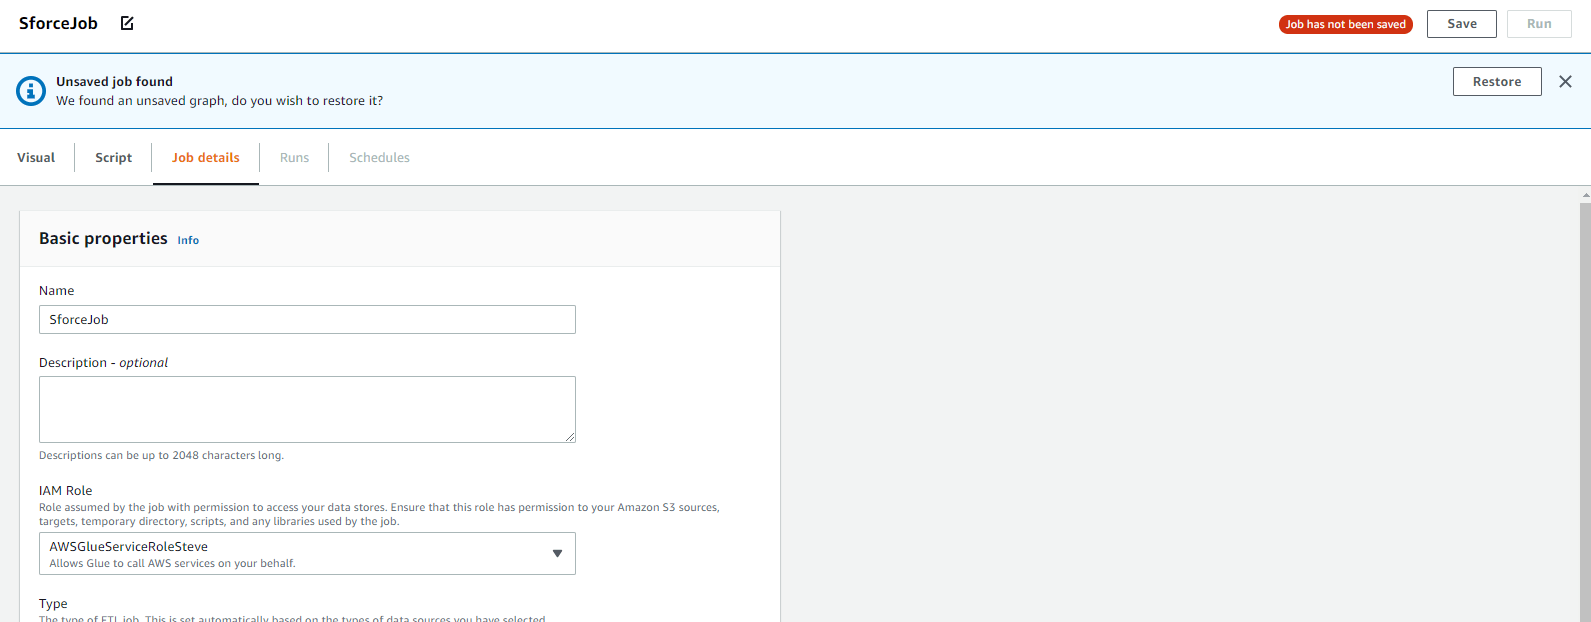
- Click on Save and then run the job. Go to Runs and monitor the Job Status.
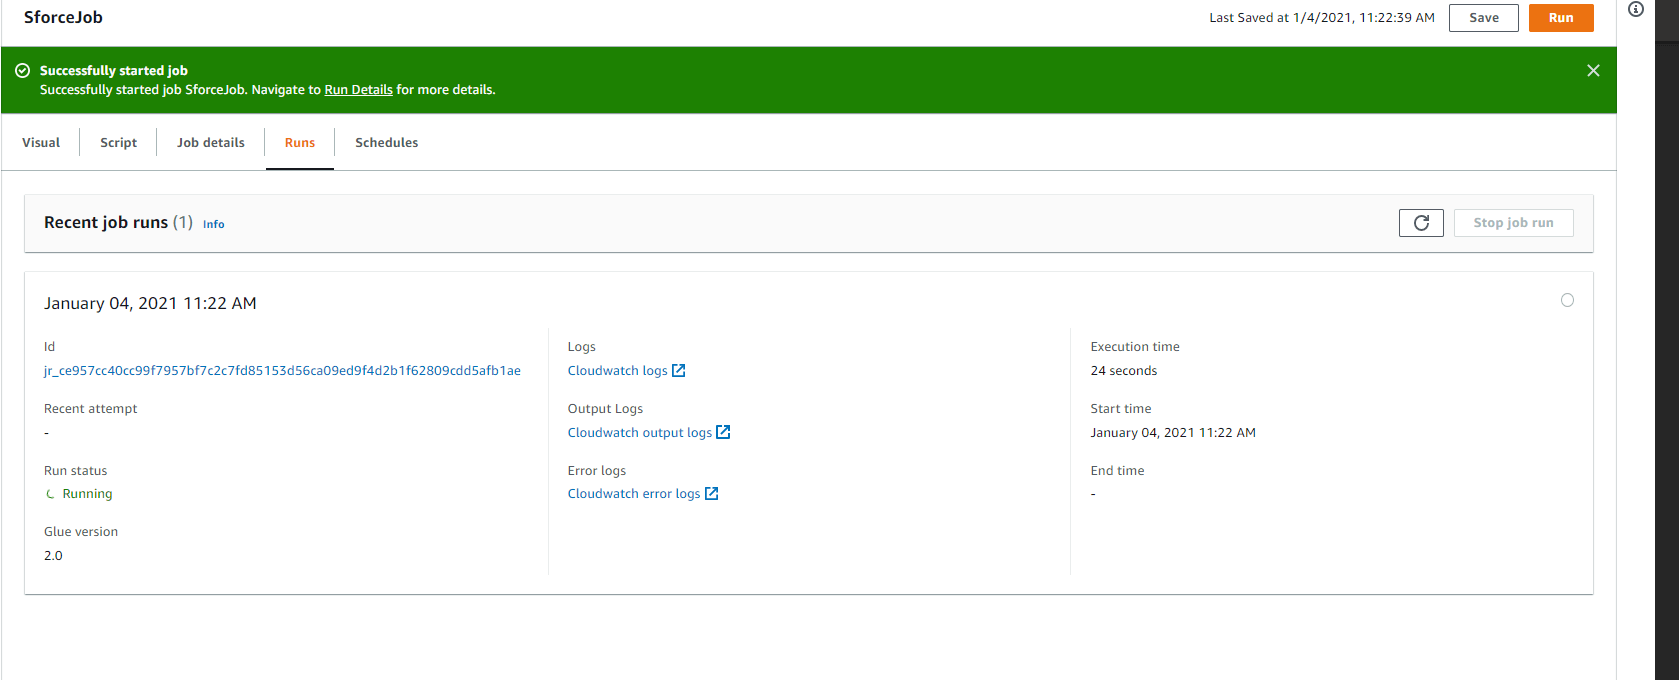
- Once the Job status has been updated to Succeeded, you can go to S3 location and find a file with the Salesforce data that you read using Progress DataDirect Cloud Connector for Salesforce.
We hope this tutorial helped you to get started with the Progress DataDirect Cloud Connectors in AWS Glue marketplace. Feel free to contact us or ask any questions if you have any issues or concerns.