Augmenting Models in Kendo UI Builder Templates

Learn how to augment, transform and add properties to your Kendo UI Builder models in Angular and AngularJS.
In previous posts in this series (you can find the first post here), we defined and used view properties in Kendo UI Builder. But there are times when we want to dynamically add new properties for both design-time and run-time rendering. Or, more commonly, we may need to transform an existing property. For example, we could convert a user-friendly property to a value more appropriate for coding.
In this post, to illustrate how to augment the models used at design-time and run-time, we are going to add two view properties to the hello world sample we developed back in the blog post introducing templates. These view properties won’t be visible in the view properties panel; as a consequence the user won't be able to modify them.
The first one is called Version and is hard-coded in the custom view. It will contain the version number of our custom view.
The second one is called generatedAt and is dynamically generated when the view is rendered in the designer. It will contain the date at which the code generator ran.
Additionally, we will augment the existing view property greeting: we will prefix it with a globe font awesome icon.
To follow along, download the template samples .zip file from GitHub or clone the repository; open the folder custom-hello-world-v3 and follow the same steps outlined in this post to install this template in your target application.
Design-Time Model
The model can be augmented in two places:
- options.json.ejs: for static properties
- generator/index.js, function augmentModel: here we can add both static properties and properties generated during JavaScript execution.The execution happens every time the design-time view is rendered in Kendo UI Builder.
Since we have access to the in-memory model, we can also modify existing properties or even delete some properties.
Next, open custom-hello-world-v3/design-time/options.json.ejs
In custom-hello-world-v1 we had left the object literal empty but in for custom-hello-world-v3, we define a property called version and assign it a String value:
{ "version": "V3"}
Now open custom-hello-world-v3/design-time/generator/index.js and check the augmentModel function. There are two items of interest:
Number one, we add the new property simply by creating a property in the input object literal inMemoryMetaModel:
inMemoryMetaModel.generatedAt = new Date().toLocaleDateString("en-US");
Second, we augment the existing greeting property by pre-pending a font awesome icon:
inMemoryMetaModel.greeting = '<i class="fa fa-globe"></i> ' + inMemoryMetaModel.greeting;
If you run this sample, check the console output (the console from which you started Kendo UI Builder). I have coded several console.log statements in the augmentModel function. This can be useful for debugging the state of the model. For example, we have the value of the greeting property as it came in and as we augmented it.
The key difference between options and index is that index is executed while options is just appended to the model.
If you are following along with a copy of the code, you should now see something like this in Kendo UI Builder:

Run-Time Model
At run-time we have very similar capabilities:
- For static properties, we can augment the JSON file:
- For AngularJS: the file is called options.json.ejs.The properties get added to $model in the view controller.
- For Angular: the file is called config.json.ejs.The properties are added to the EJS variable view which we can use to define TypeScript properties in __name__.view.base.component.ts.ejs
- For dynamic properties processing: we also have the function augmentModel in generator/index.js for both AngularJS and Angular.
Independently of how we add properties, we use them the same way we learned back in first post, and as if they were added to the custom view definition file (custom-hello-world-v3.json).
To see how this is coded, check the augmentModel function in these files:
- custom-hello-world-v3/angular/generator/index.js
- custom-hello-world-v3/angularjs/generator/index.js
And check the template files for how we use these properties:
- views/custom-hello-world-v3/angular/__name__.view.component.html.ejs (for Angular)
- views/custom-hello-world-v3/angularjs/template.html.ejs (for AngularJS)
HTML Property with Code Editor
As a bonus in this sample, I have added an extra property to show the built-in HTML Editor.
The property is called html. The main difference from previous properties we have seen so far is its editor type. Check custom-hello-world-v3/custom-hello-world-v3.json for the last property. The editorType is set to codeEditor.
By specifying this editor, the property renders with an Edit button as in this screenshot:

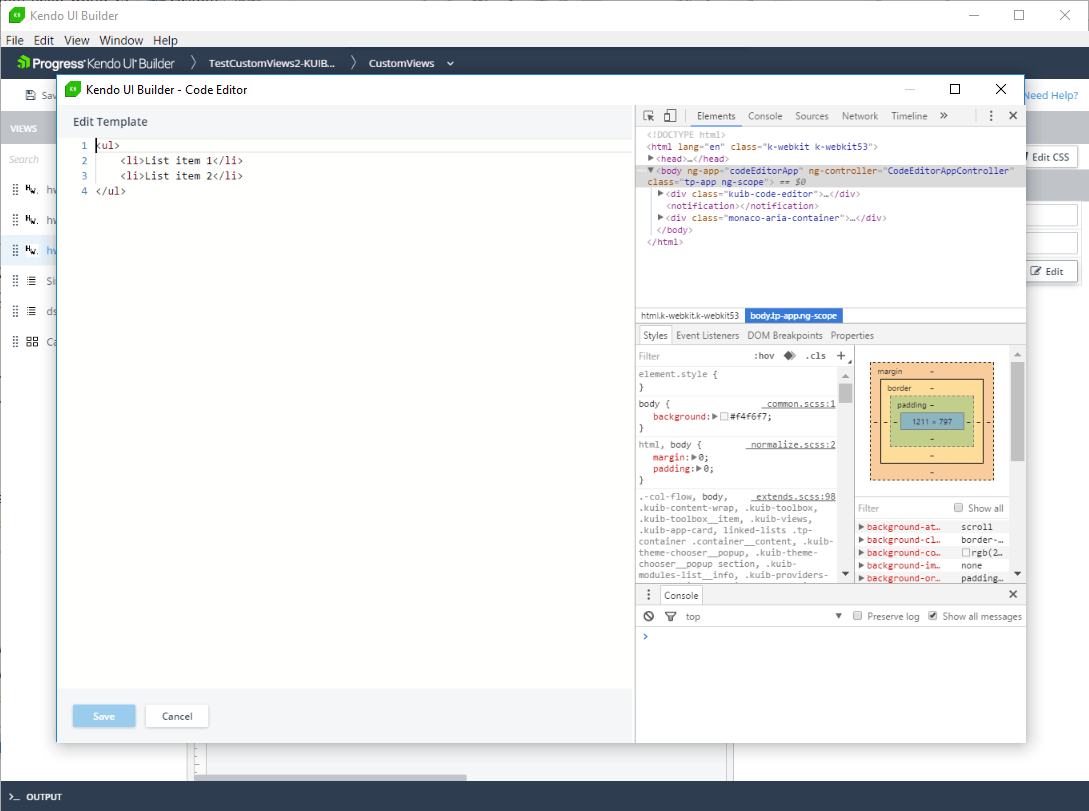
When clicking on this button Kendo UI Builder will launch a code editor. Give it a try and enter some HTML, for example:
<ul> <li>List item 1</li> <li>List item 2</li></ul>
You should see the following:

Augmenting, Transforming and Adding Properties
You should now understand how to augment or transform existing properties and how to add new properties to the model in Kendo UI Builder. These properties are used to render the design-time view as well as to generate the code for both AngularJS and Angular. Added properties are not editable from the view properties panel. These techniques will become useful when we develop more complex views.
When you're ready, continue onto the next post, where we will explore how to create custom components.
If you jumped into this series in the middle and want to start from the beginning, you can find the previous blog posts here:

Thierry Ciot
Thierry Ciot is a Software Architect on the Corticon Business Rule Management System. Ciot has gained broad experience in the development of products ranging from development tools to production monitoring systems. He is now focusing on bringing Business Rule Management to Javascript and in particular to the serverless world where Corticon will shine. He holds two patents in the memory management space.
