A Guide to Google Search Console for Web Designers and Developers

Learn how to set up Google Search Console, a free SEO tool, and make the most of it as a web designer or developer.
Google Search Console never seems to get as much fanfare as Google Analytics. However, it should be an important part of every digital team’s arsenal as it provides valuable insights about the indexing of your website, how it performs in search results, and what’s actually attracting visitors to your site.
This guide will show you how to get started with Google Search Console as well as the features you should be using to learn more about the perception of your website and to fix its performance in search results.
How to Set Up Google Search Console for Your Website
If your website isn’t currently set up on Google Search Console, here’s what you need to do:
Step 1: Create or Log into Your Google Account
You need a Google account in order to use Google Search Console. If you already have a Google Analytics account for your website, make sure to use the same Gmail address when setting up GSC.
You can log in from the Search Console homepage.
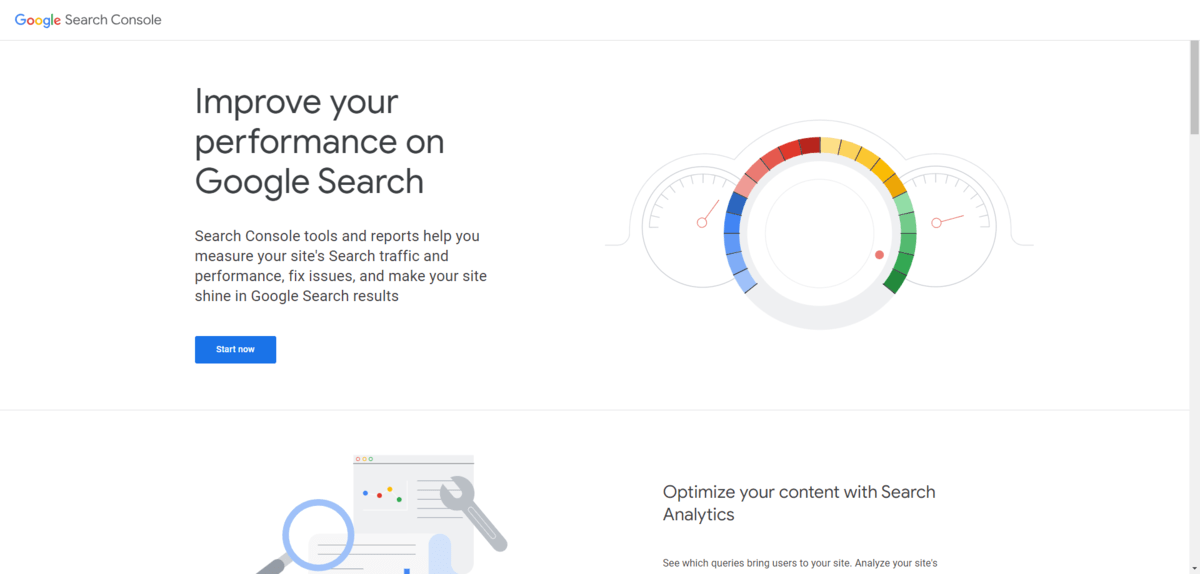
Click “Start now.”
Step 2: Add Your Property
If this is your first time using Google Search Console, you won’t have any properties (i.e., websites) or data in here yet.
Go to the top-left corner of the page where the “Search property” box is and click “Add property.” There are two types of properties you can add:
Domain is for the primary domain name and will track all subdomains and pages within it. URL Prefix is only if you want to track a specific URL, subdomain or protocol.
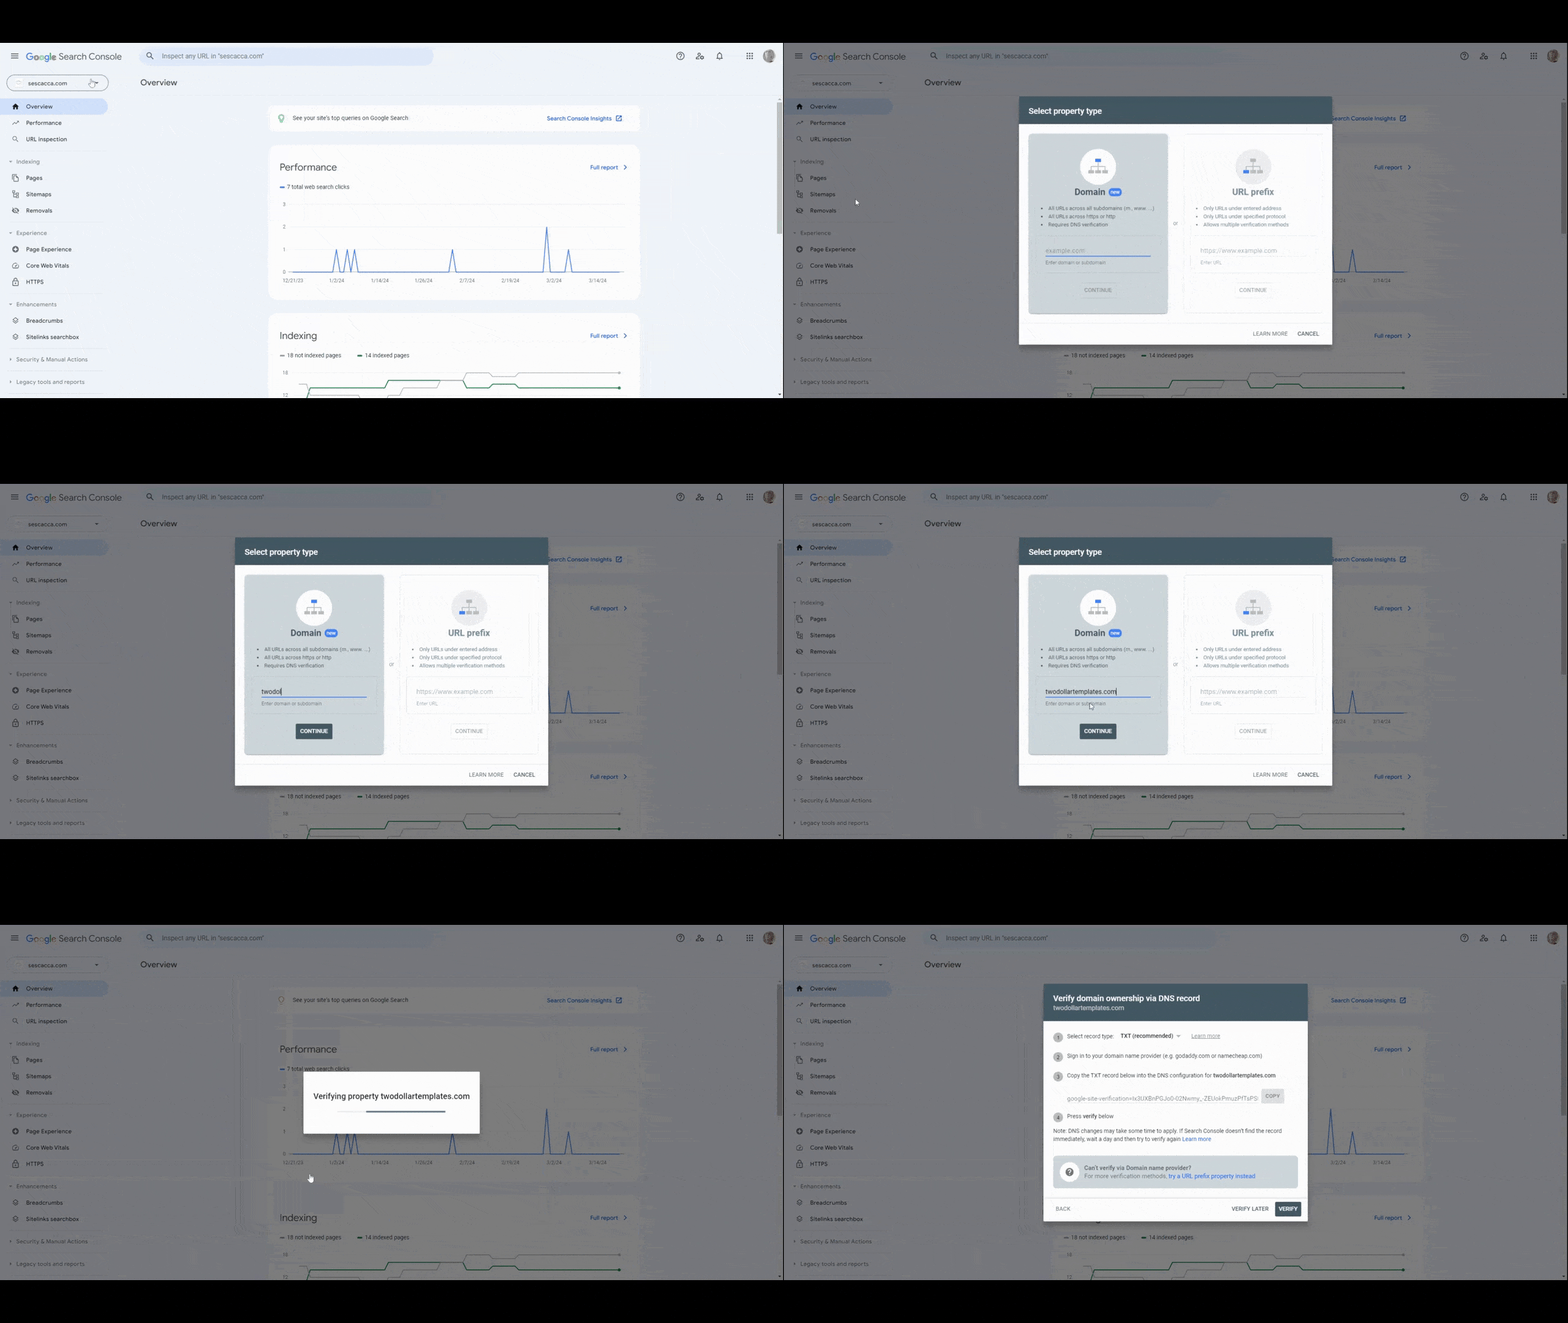
Enter your domain name. Then hit “Continue.”
Step 3: Create the DNS Record
On the next screen, Google will provide you with instructions on how to verify the ownership of this domain name.
If your property is a DOMAIN, you’ll have to add a TXT or CNAME record to your domain name provider account.
If your property is a URL Prefix, there are various verification methods you can use. For instance:
- Download an HTML file and upload to the core of your website.
- Add the meta tag to your home page
<head>. - Sync your GSC account with a GA account that has already verified the domain.
- Use Google Tag Manager.
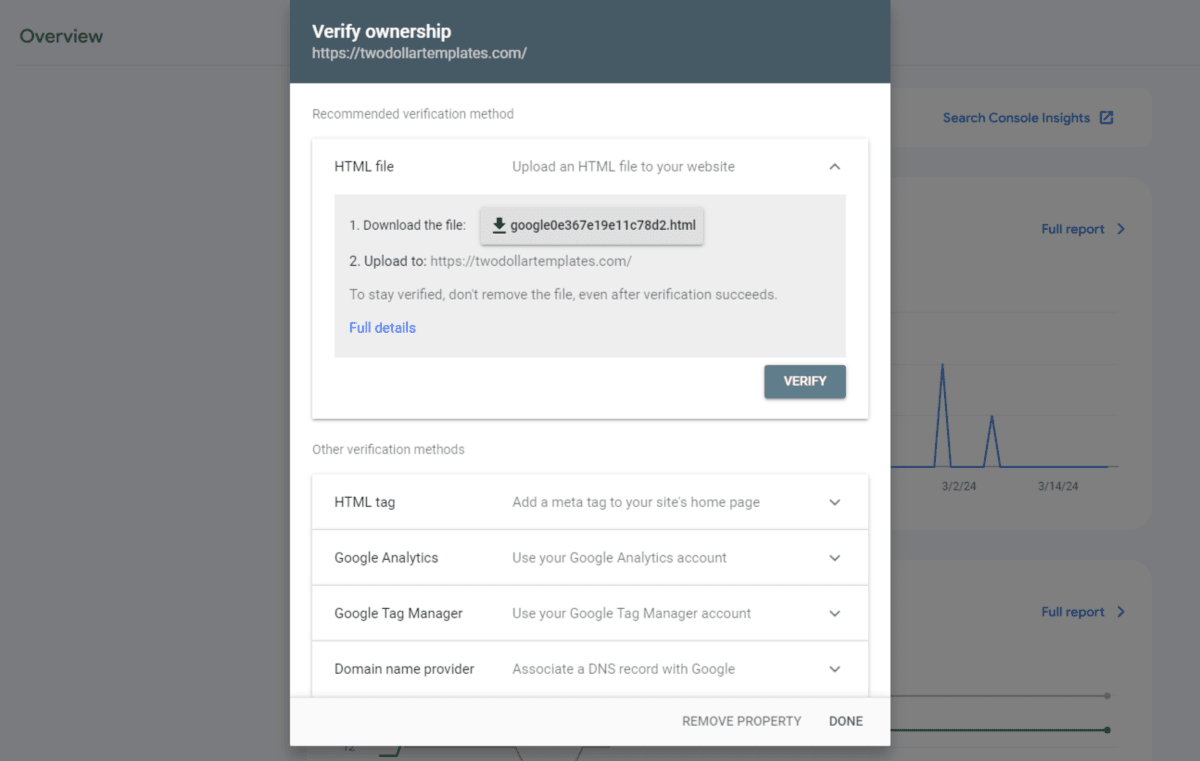
Once you’ve completed the verification method, come back to GSC and click “Verify.”
It can take up to 24 hours for Google to detect the verification method, so return later if your ownership isn’t yet confirmed.
Step 4: Connect to Google Analytics
If you didn’t use Google Analytics as your verification method, connect your new GSC property to it now.
Go to Setings > Associations. Click the “Associate” button to connect the two:
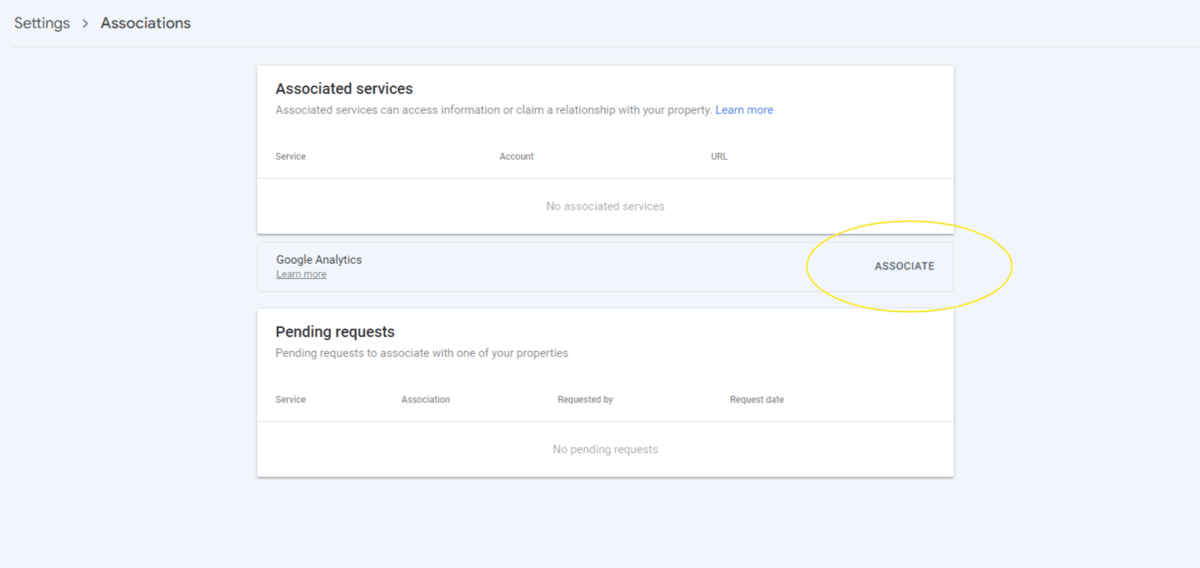
If you have more than one GA4 property, select the one that matches the property you just created. Click “Continue.”
If you have more than one data stream, select the correct one from the list. Then hit “Continue” once more.
Hit “Confirm” to complete the association. You’ll now be able to see GSC data in your GA4 reports.
Step 5: Upload Your Sitemap
The last thing to do is submit your sitemap.
Although Google will inevitably find your content on its own, this gives you a direct link to the search engine. Not only that, you can create custom sitemaps for different types of content to ensure that Google finds and indexes your most important content first.
To submit a sitemap, go to Sitemaps. Enter your sitemap URL into the field.
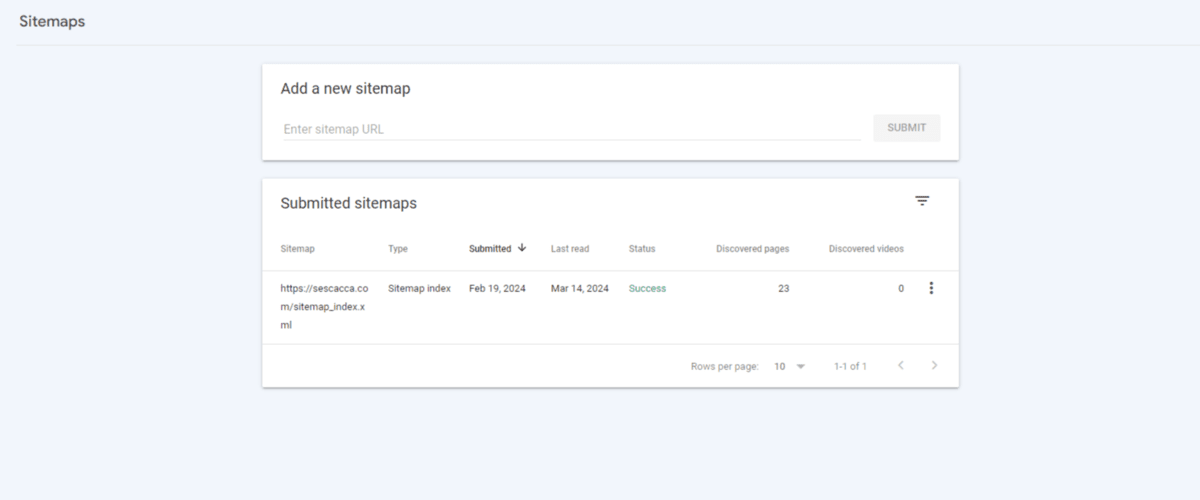
Your sitemap URL will look something like this:
https://domainname.com/sitemap_index.html
If you can’t find your sitemap at that address, you’ll need to generate one. Here are the steps for generating a sitemap in Sitefinity CMS.
You can also submit individual sitemaps using this tool. For instance, let’s say your website has a blog, an ecommerce shop and a video resources area. You could submit separate sitemaps for your posts, products, categories and videos here.
It can take some time for Google to get around to indexing your content. So give it a week or two before you check back on its progress.
Google Search Console Features You Should Be Using
With your Google Search Console account set up, you can now start digging around and using its features. These are the ones that’ll be most valuable to you as a web designer or developer:
Performance
The Performance tab breaks down your website’s search performance data in two formats.
The first thing you’ll see is this chart:
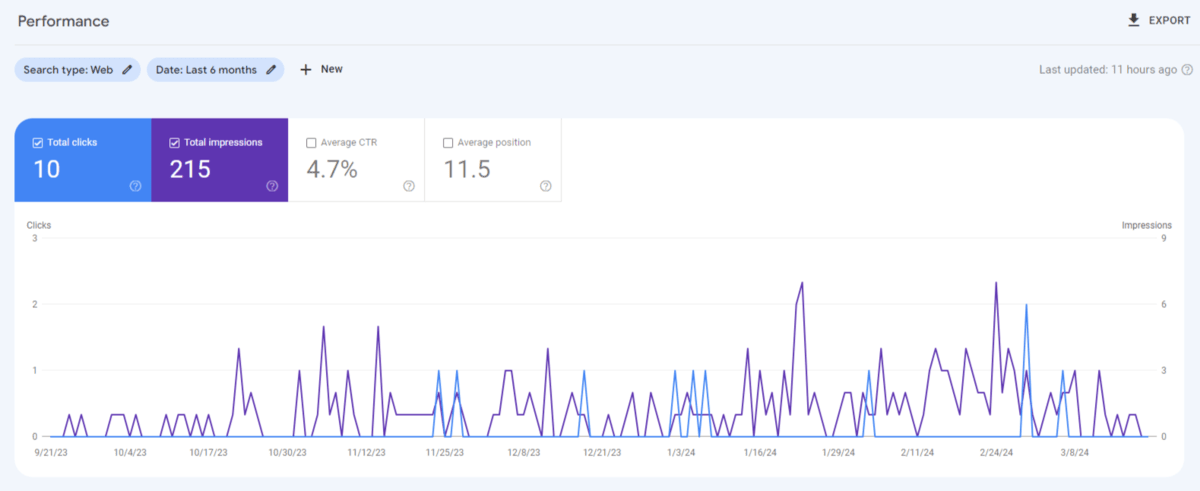
You can use this chart to visually examine your website’s overall search performance over time. You can use the filters at the top to view data for:
- Web (the entire website)
- Image
- Video
- News
You can also change the timeframe to review changes in performance over shorter or longer periods of time as well as comparing one time frame against one another.
You’re also able to choose which data points are represented in the chart as well:
- Total clicks (to your website)
- Total impressions (views)
- Average click-through rate (CTR)
- Average position (ranking)
While this data visualization makes it easy to detect highs and lows in your performance, the table down below provides more details about what’s going on.
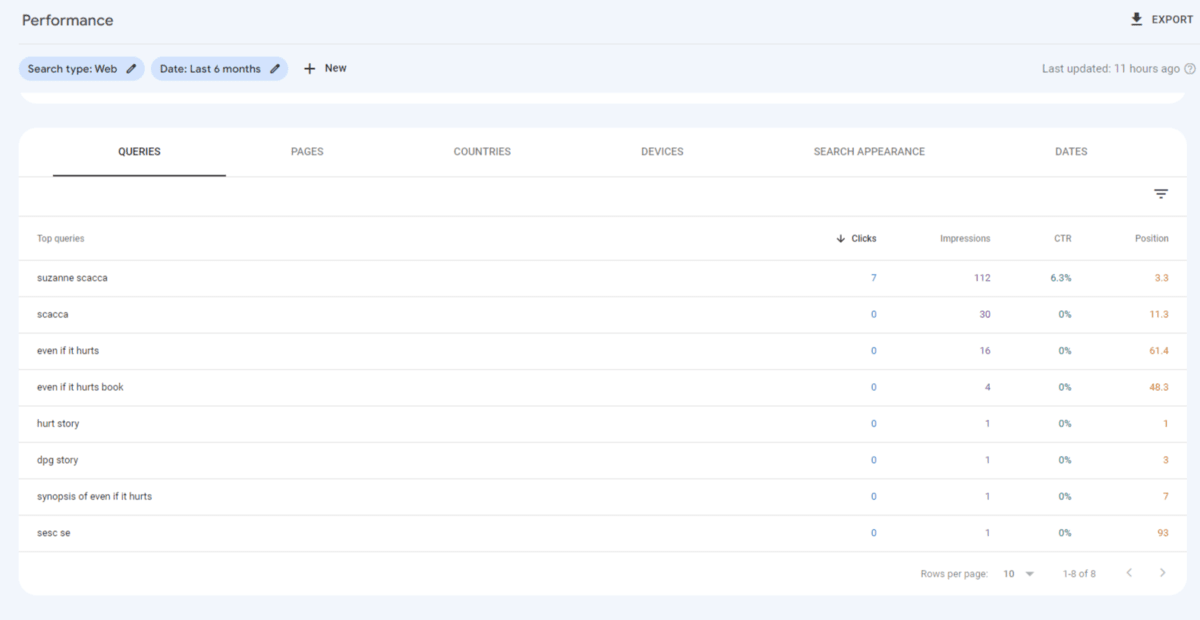
From this view, click through the tabs to learn more about how your site is doing in search.
- Queries shows you all of the search terms people have used to find your content in Google search results.
- Pages shows you how each of the pages on your site performed against these metrics.
- Countries shows you where all this search traffic has come from.
- Devices shows you the breakdown between desktop, mobile and tablet users.
- Search Appearance shows you how enhanced search results—like product snippets, sitelinks searchbox and FAQs—helped improve your search performance.
- Dates shows you the distribution of search activity on any given date.
You can also use the data headers on the right to sort the results based on what you want to know.
For instance, if you sort Clicks from highest to lowest, you’ll be able to find out which keywords and pages were the most successful in driving traffic to your site.
URL Inspection
The URL Inspection tab allows you to see how any page looks from Google’s perspective. Click on it and it’ll focus on the search bar at the top, which you can now use to inspect any page.
Here’s how it works:
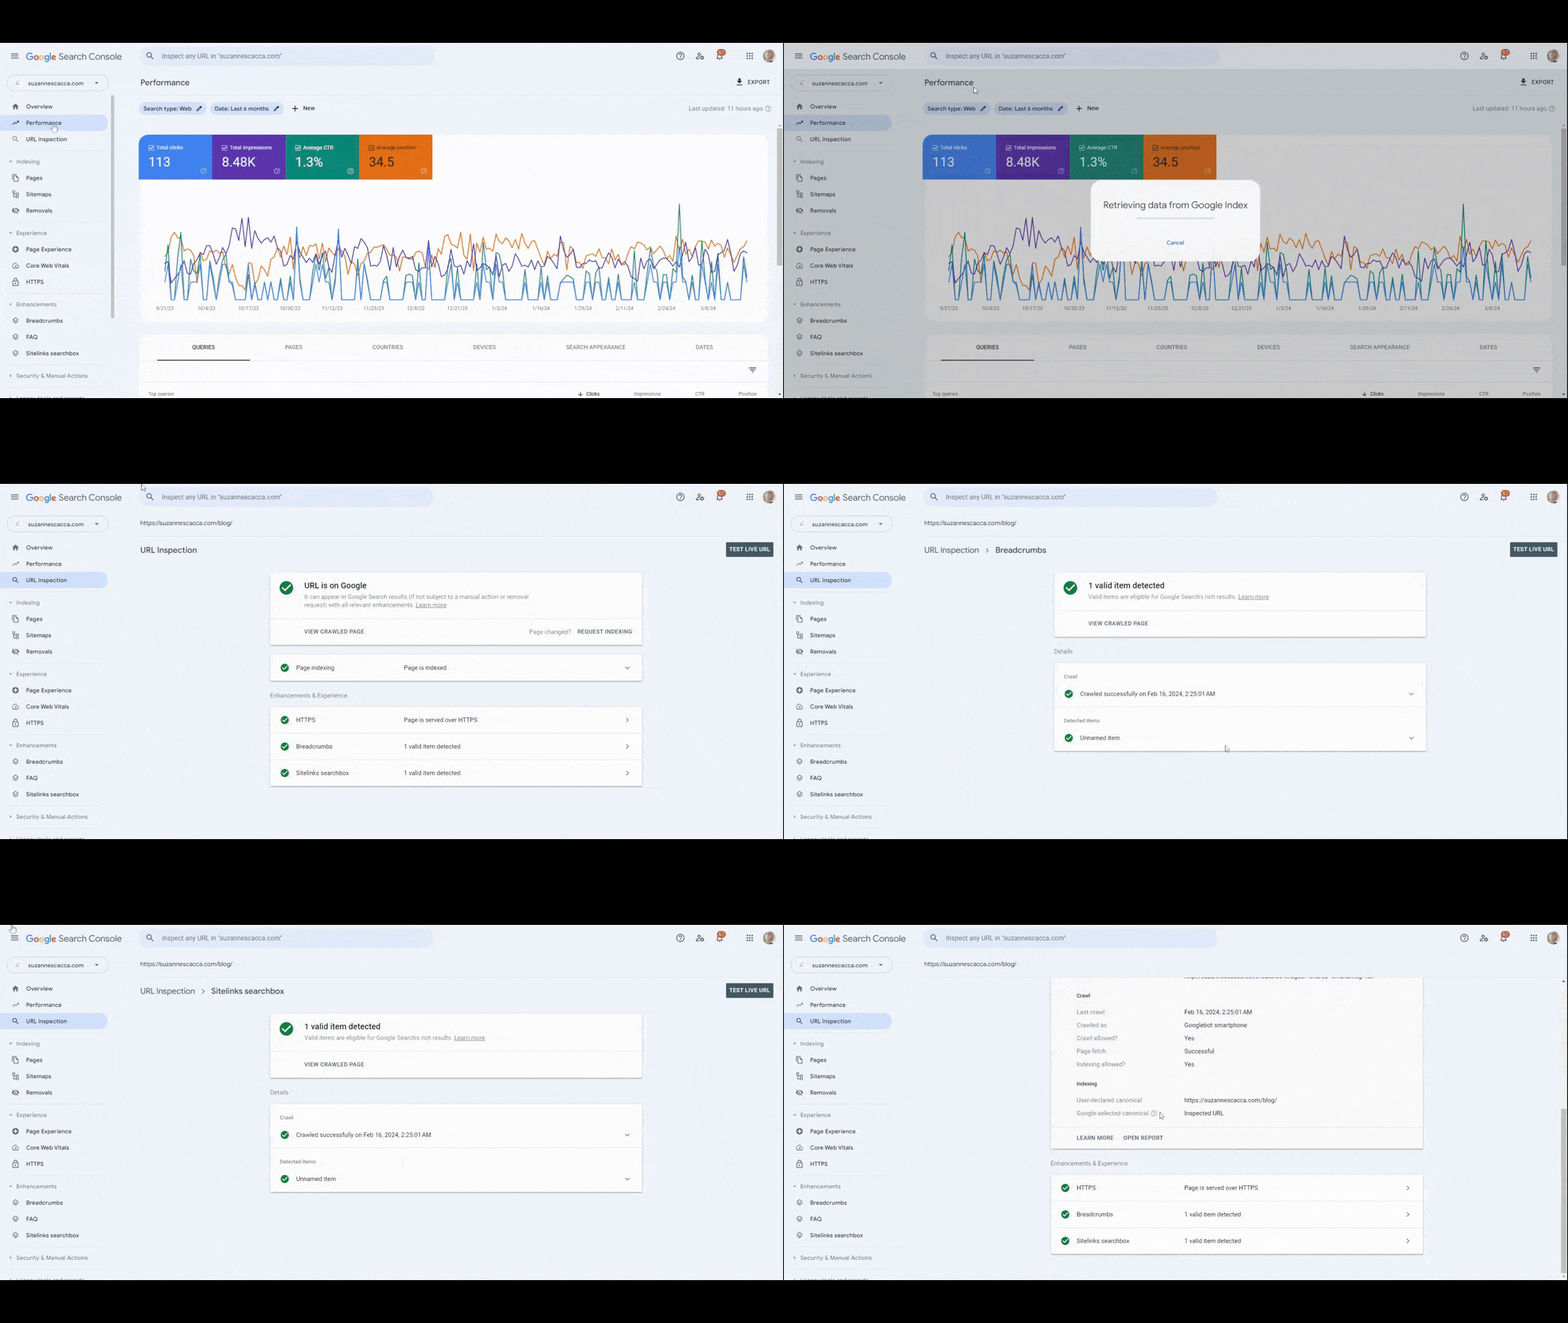
This page tells me a number of things about the URL:
- The page is indexed and appears in search results.
- When the page was indexed.
- Which pages refer traffic to it.
- Which HTTP protocol the page is served over.
- If there are breadcrumbs associated with this page.
- If there’s a sitelinks searchbox associated with this page.
For these last two, you can click into each to see what exactly the search enhancement looks like on the backend of your site. For example, the sitelinks searchbox for my blog shows me what sort of structured data has been identified by Google for the page.
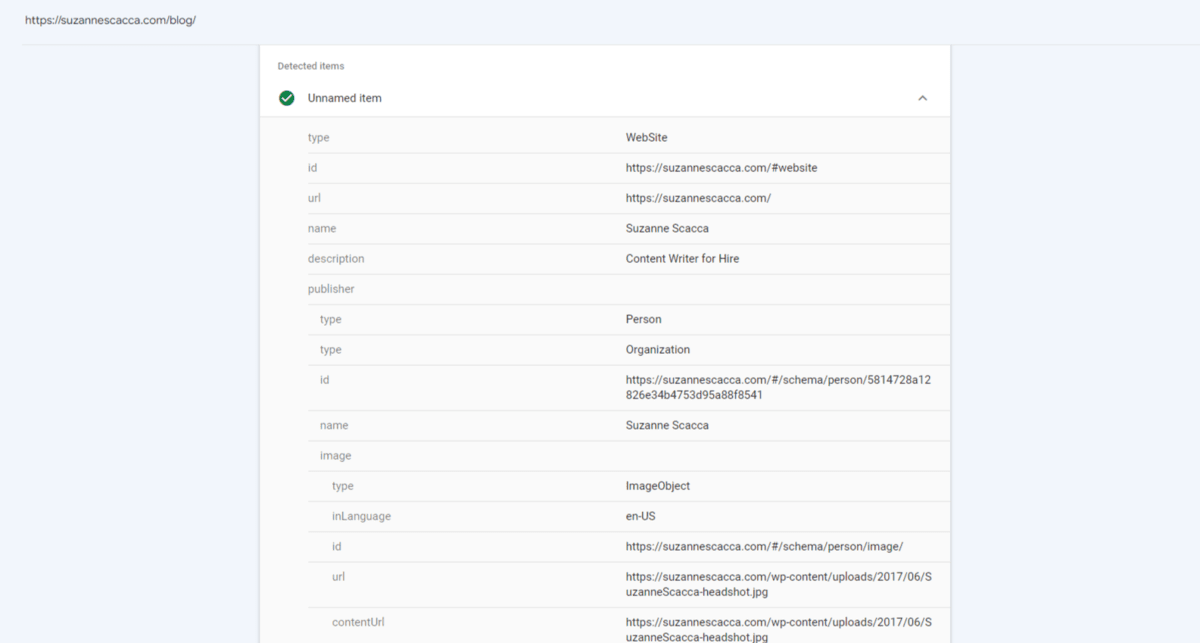
One other thing you can do with URL Inspection is to view the page that Google has crawled and indexed. If it’s an outdated version, you can request that Google re-index it from this page by clicking “Request Indexing”.
Indexing
There are three tabs under the Indexing section.
Pages
Pages is where you’ll find a list of every page identified by Google as well as its indexing status.
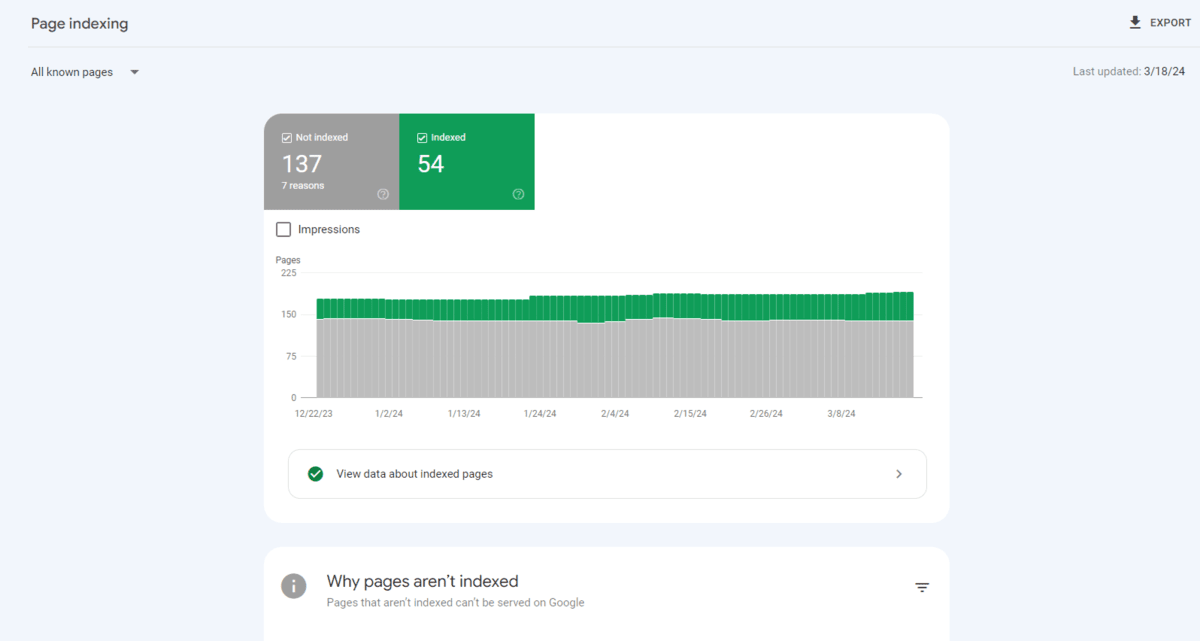
The chart at the top shows how many pages are and are not indexed. If you click on the “View data about indexed pages” link, it’ll tell you which of the pages are currently indexed.
Down below is where you’ll find out why Google isn’t indexing your pages. There are many reasons. For example:
- The page has a redirect.
- There’s an alternate page with a proper canonical tag. Basically, the canonical page is the master copy and this is a duplicate.
- You’ve added “noindex” to the page and excluded it from search results.
- There’s a 404 “not found” error when trying to find it.
- You’ve blocked the page from being indexed in your robots.txt file.
- The page has been discovered, but Google hasn’t gotten around to indexing it yet.
- The page has been crawled, but it hasn’t been indexed yet.
It’s a good idea to check this list of non-indexed pages every few months or so. Some of them may be legitimate cases of pages that shouldn’t be indexed. But you may also discover that there’s viable content that Google has mistakenly skipped.
If you have a high-quality page that’s not indexed and should be, go back and use the URL Inspection tool to request indexing. And if Google is telling you that something on your site is blocking it—like the robots.txt or “no index” tag—then go inspect your files to fix the issue.
Sitemaps
You’ve already seen how to use the Sitemaps section to upload sitemaps to Google for indexing. You can also use this tool to view each sitemap and the contents within it.
Removals
The other tab in this section is called Removals. You can use this tool to remove pages from search results.
Google will automatically do this over time when pages are no longer available (i.e., when you’ve deleted or redirected them). However, you might not want to wait that long.
If you have something you urgently need to remove from search results, click the red “New Request” button.
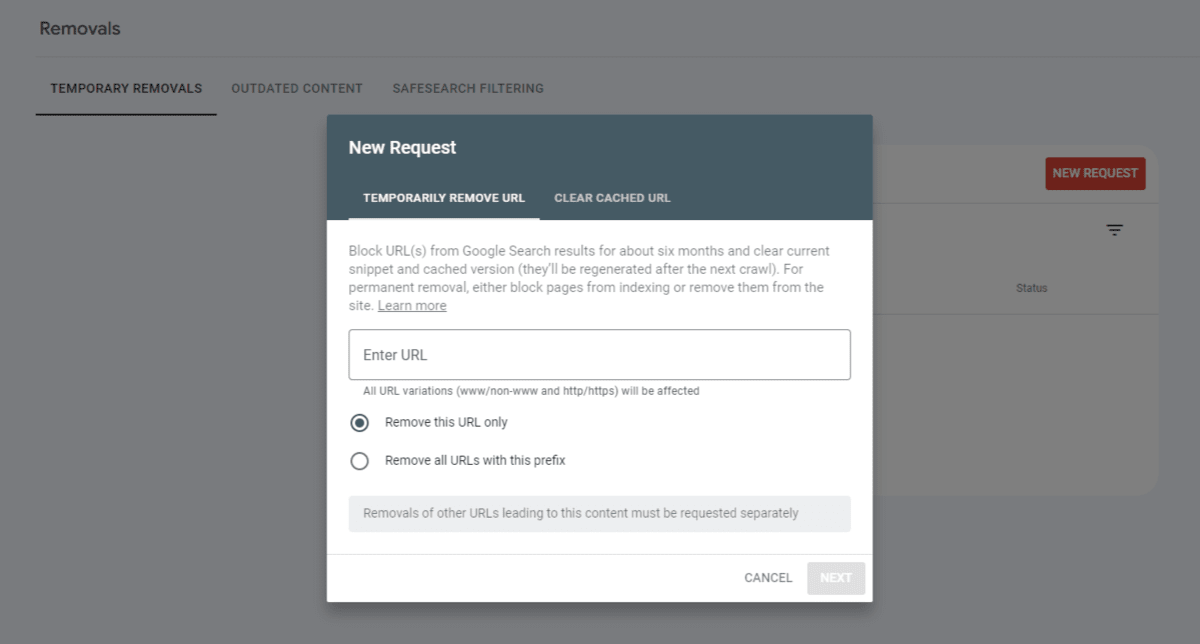
There are two actions you can take.
You can block a URL from search results for six months. Use the Temporarily Remove URL option to do this.
You can also ask Google to fix outdated content if it’s gotten stuck in the Google cache. Use the “Clear Cached URL” option to do this.
By the way, there’s a third tab in this section called Safesearch Filtering. If someone reports your page for having explicit content, Google will label your content as such and place it here. You can appeal that decision from this tab.
Links
A website’s internal link strategy is an important part of its rankability. While GSC won’t provide you with a data visualization of your internal link system the way a tool like Screaming Frog might, you can still use it to evaluate the overall health of your link strategy.
Under the Links tab, you’ll find numerous lists.
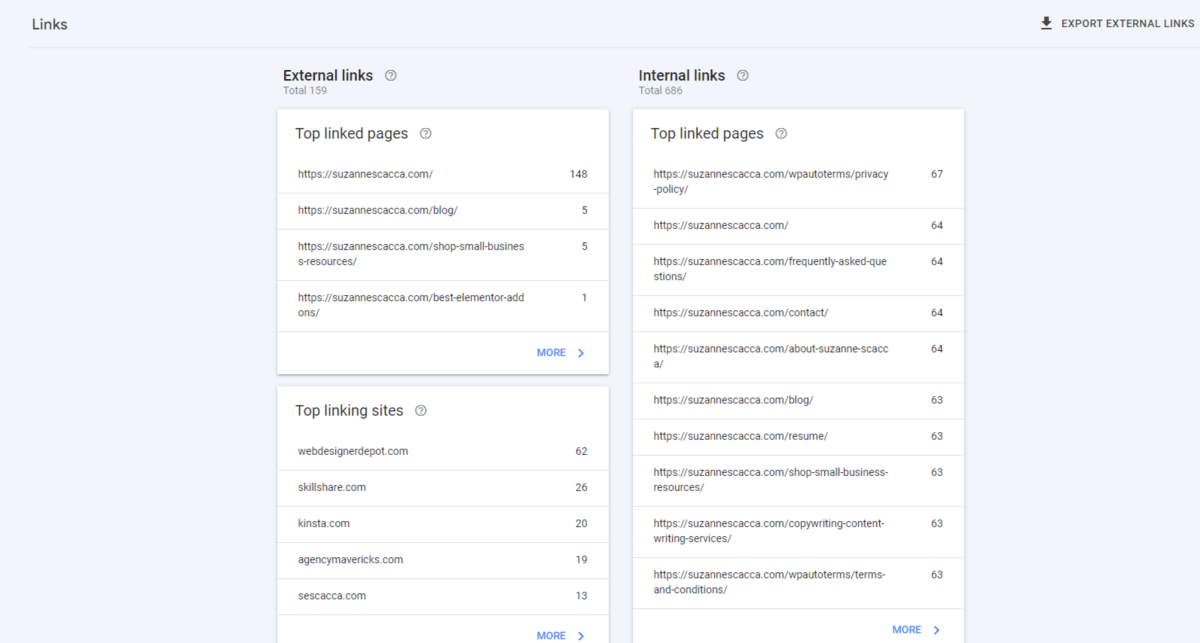
Internal links > Top linked pages on the right shows you which pages have the most internal links.
You can click on any of these pages to find out where these internal links come from. They could be internal links within the content of the page as well as in the header, navigation or footer.
Use this tool to find pages that aren’t related or that shouldn’t otherwise be linked.
Also use it to evaluate the relevance and authority of your pages. Typically, pages with the highest number of internal links are the most important ones on the site. Use this tool to discover if any of your most valuable or critical pages are short on internal links.
External links on the left will show you a few different things:
1. Which pages on your site are the most commonly linked to from other websites.
Review this list to see if you’re confused or surprised by any of the external links you’ve received. You can click on each to see which websites and pages on those sites have provided the link.
If you find a link that doesn’t belong on a site or one that you don’t want to be associated with, it might be worth reaching out to ask if they’ll remove it.
2. Which websites contain the most links to your website.
This section will show you a list of websites that link the most to your content. You can click through these websites to find out which pages they’re referring traffic to.
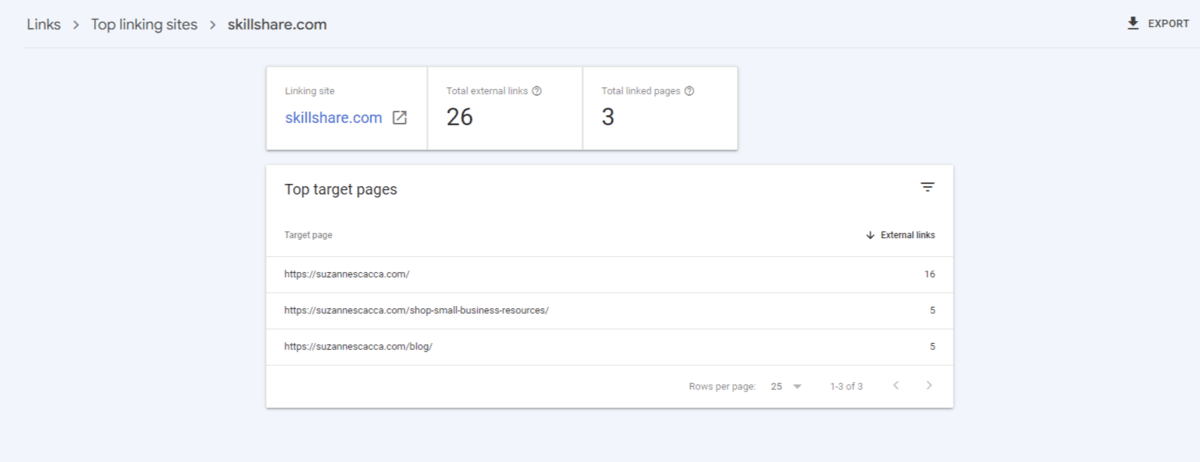
What’s good about this tool is you might discover new audiences that are interested in your website and content. You can use this to either generate new partnerships—and build your external link profile through them—or identify similar websites that might be interested in sharing your content with their users.
With a substantial amount of relevant, high-authority and high-quality backlinks (external links), it could greatly help improve the ranking of your website.
3. The top linking (anchor) text used to direct people to your site.
In order for anchor text to be effective for SEO, it needs to be clear and descriptive.
For instance, “go here” is not an effective way to link to a web page about the top content management systems. In order to get more clicks and clearly communicate to search engines the purpose of the link, the anchor text would need to be something like “discover the top content management systems of 2024.”
There’s not a whole lot you can do with this section in Google Search Console as it’s the anchor text used by other websites. That is, unless you have a partnership with that site and can ask them to improve the linking text.
That said, it’s still good to know what the general intent is when people are sharing links to your content. This list might generally signal a positive intent—i.e., people wanting to share your content or site for good reasons. But do keep your eye out for negative linking text as it might suggest that someone has criticized your business or site.
Settings
There are a few things you’ll want to use the Settings section for.
For starters, you can use Users and permissions to add other people to this Google Search Console account. You may want to do this if you’re a web designer or developer who set up the account for a client or employer’s website.
This tab allows you to add other users to the account. Like your client, their marketing manager or an SEO collaborator who would benefit from seeing this data.
Conversely, if your client set up this account already, direct them to this section so they can set you up as a user.
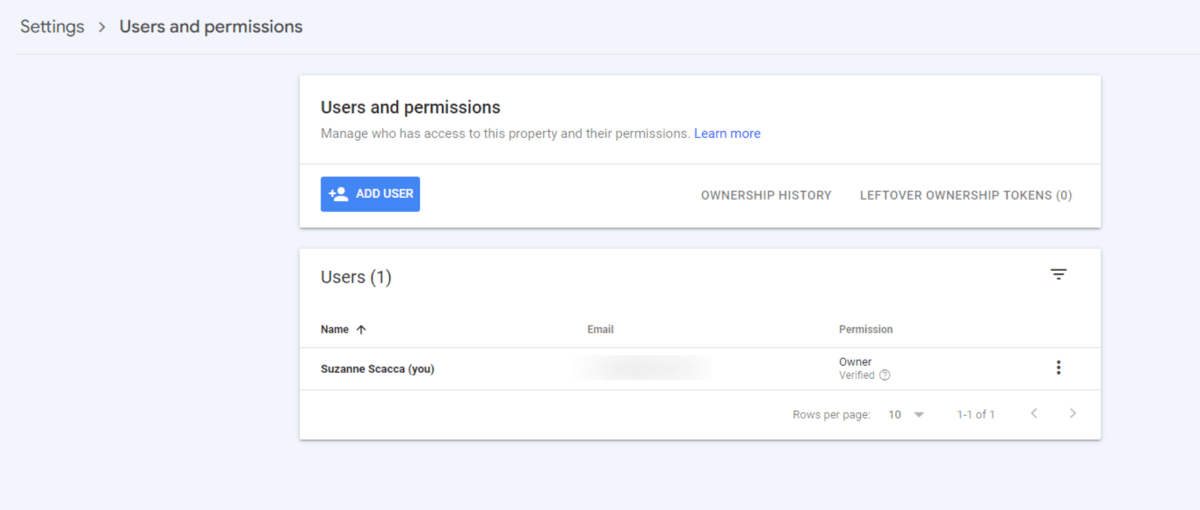
Click the blue “Add User” button, enter their Gmail address and then configure their permissions. They can become an owner, get full access or have restricted access.
Another thing you can do from this section is to review your robots.txt file. This is convenient as you won’t have to go to the root of your site to figure out what it says and which pages it might be restricting from indexing.
Wrapping Up
If you’re concerned about the user experience with the website you’ve built, GSC is an essential tool. While it won’t tell you how people are responding to the website itself (since that’s what Google Analytics is for), it will tell you how they’re responding to your site in search results. And if they’re even seeing it at all.
While your content management system likely has its own powerful insights about your users as does Google Analytics, Google Search Console shows us a different part of the user journey. And while it’s important to improve the on-site user experience as much as possible, we also need to optimize our content so that even more users can find it in search results.

Suzanne Scacca
A former project manager and web design agency manager, Suzanne Scacca now writes about the changing landscape of design, development and software.
