Managing Windows System Administration with WMI and Python

Tired of managing Windows system administration tasks manually? Wish you could set up a few Python scripts instead? Where there's a will, there's a way! In this article, we'll show you how to install Python's WMI module and how you can use it to perform system administration processes.
Windows Management Instrumentation (WMI) is Microsoft's implementation to the DMTF's Common Information Model (CIM) which is a vendor-neutral, industry standard way of representing management information. It allows you to query almost any piece of information from any computer which is running the necessary agent with the right permissions.
Python has module named: 'wmi' which is light weight wrapper around available WMI classes and functionalities and could be used by systems administrators to query information from local or remote Windows machines.
Installing the Module
Before you can install the Python module, we require ‘pip’ which is package management framework required to install the modules from trusted public repositories, once you have ‘pip’ you can install the module using following command from a Windows command prompt (CMD).
python.exe -m pip install wmi
Establishing a Connection
After installing the module, we will try to establish a connection to a machine. Most of the time we will connect to our local machine, using the following code sample in Python:
# connecting to local machine
conn = wmi.WMI()
If you want to connect to a remote machine, then you have to provide a machine name/IP Address, and use named parameters ‘user’ and ‘password’ to pass your credentials, so that your account can be authenticated to establish a remote WMI connection.
# connecting to remote machines
import wmi
conn = wmi.WMI("13.76.128.231", user=r"prateek", password="P@ssw0rd@123")
Finding a WMI Class
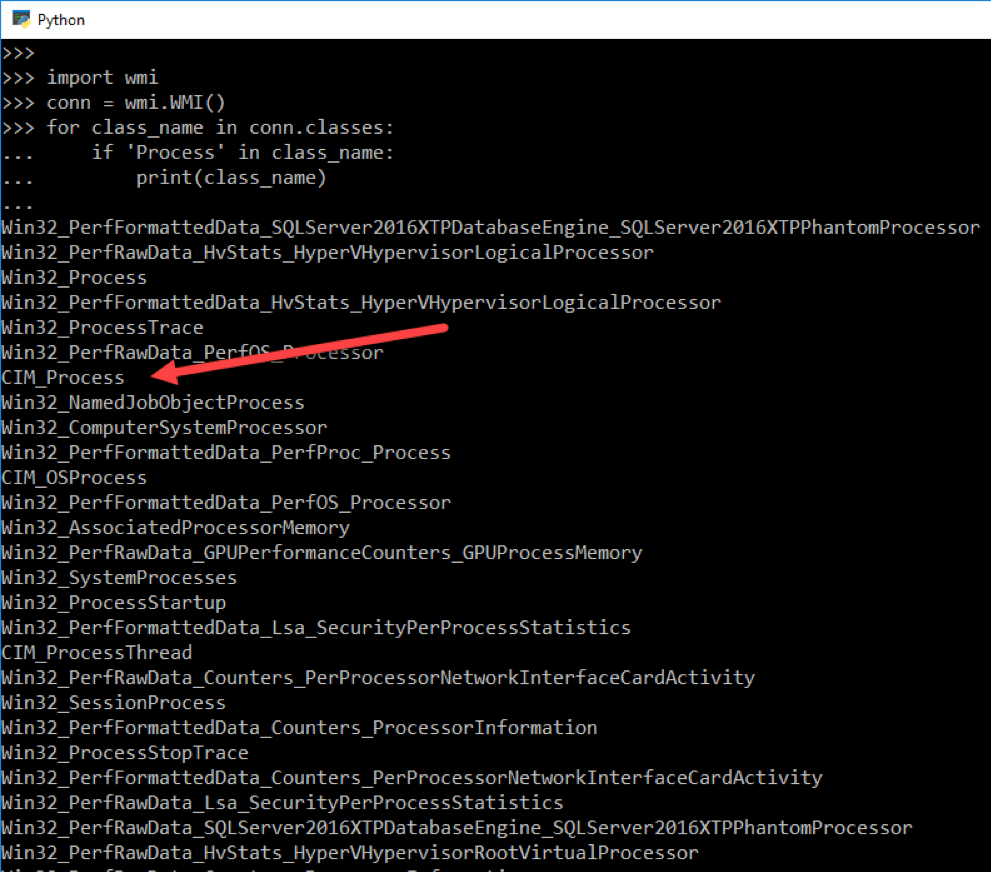
Now we have the connection established, but in order to query specific system information, we have to first find out the WMI class that can provide that information. In order to achieve that we utilize the ‘classes’ property of WMI object like wmi.WMI().classes, which will return the list of WMI classes.
You can filter out specific keywords from these to find the exact class you are looking for, like in the following example.
import wmi

conn = wmi.WMI()

for class_name in conn.classes:

    if 'Process' in class_name:

        print(class_name)
Finding Properties and Methods of WMI Class
Even if you know the name of WMI Class, you will still require the exact name of the property these classes offer and methods that can perform specific operations. In order to get properties and methods of as specific WMI class, create a WMI connection and use the ( ‘.’ ) Dot operator and ‘Class Name’ to access WMI namespace, then ‘methods’ or ‘properties’ attribute to return a Python List of property/method names.
import wmi
# prints all properties
wmi.WMI().Win32_Process.methods.keys()

# prints all methods
wmi.WMI().Win32_Process.properties.keys()
 Handling Process
Now we know the properties and methods of class ‘Win32_Process’, so we will use the WMI class name followed by an open & close parenthesis to return objects of the WMI class, like in the following example:
# list processes
import wmi
conn = wmi.WMI()
for process in conn.Win32_Process():
 print("ID: {0}\nHandleCount: {1}\nProcessName: {2}\n".format(
 process.ProcessId, process.HandleCount, process.Name
 )
 )

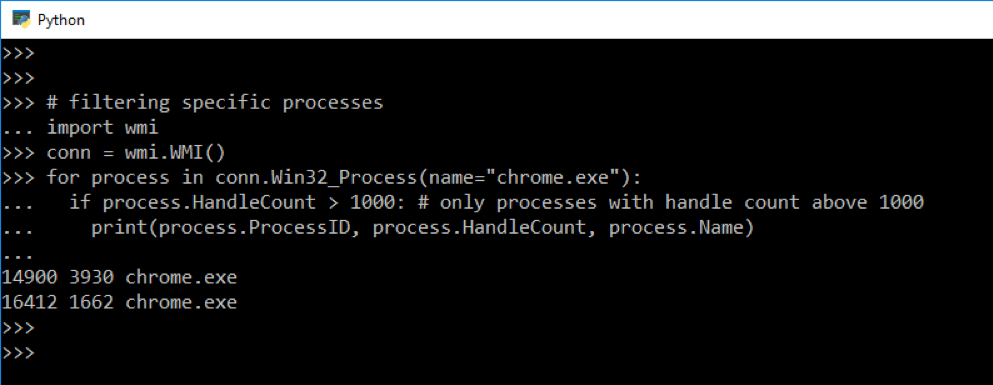
You can even filter processes with name and properties to print only selected process(es), like in the following example we selected all ‘Chrome.exe’ processes running locally and then filtered out the processes that have handle count more than 1000 using
a conditional statement: if
# filtering specific processes
import wmi
conn = wmi.WMI()
for process in conn.Win32_Process(name="chrome.exe"):
 if process.HandleCount > 1000: # only processes with handle count above 1000
 print(process.ProcessID, process.HandleCount, process.Name)

WMI Module also allows to start new process and kill any existing one, like in the following code sample we created a new notepad process then stored the Process ID to uniquely identify the process, so that it can be terminated later using the id.
# start a new process and capture the process id
import wmi
conn = wmi.WMI()
pid, returnval= conn.Win32_Process.Create(CommandLine="notepad.exe")

# kill the process using process id
conn.Win32_Process(ProcessId=pid)[0].Terminate()
Handling Services
In a similar approach we can also list and filter out services running on a machine using WMI class: ‘Win32_Service’
# list services
import wmi
conn = wmi.WMI()
for s in conn.Win32_Service(StartMode="Auto", State="Running"):
 # filter service names
 if 'Update' in s.Name:
 print(s.State, s.StartMode, s.Name, s.DisplayName)

And even perform start and stop operations on target service(s), like in the following example we first filtered out all Windows services that are stopped and in startup mode ‘Automatic’, then use the ‘StartService()’ method to start the window service. In case you want to stop the service you can use the ‘StopService()’ method.
# start target service
import wmi
conn = wmi.WMI()
for s in conn.Win32_Service(StartMode="Auto", State="Stopped"):
 if 'Update' in s.Name:
 result, = s.StartService()
 if result == 0:
 print("Successfully started service:", s.Name)
Get Disk Space
You can also use WMI Class: Win32_LogicalDisk to get the free space on each logical disk attached to the system.
import wmi
conn = wmi.WMI ()
for disk in conn.Win32_LogicalDisk():
 if disk.size != None:
 print(disk.Caption, "is {0:.2f}% free".format(
 100*float(disk.FreeSpace)/float(disk.Size))
 )
Get Local Users and Groups
System administrators can also use WMI module to list local users and groups, in the following example we are using Associators, which are classes which links two classes together like: Win32_Group and Win32_UserAccount
import wmi
conn = wmi.WMI()
for group in conn.Win32_Group():
 print(group.Caption)
 for user in group.associators(wmi_result_class="Win32_UserAccount"):
 print(" [+]", user.Caption)

In this article we’ve covered how to install Python’s ‘wmi’ module, how to create a connection to a local or remote machine to retrieve system information like processes, service, disks and user/group using WMI classes, and even how to perform system administration tasks like starting/stopping targeted services and processes.


