Send custom payload

NEW TO SITEFINITY?

To change the default payload sent by service hooks, you need to create a custom action that modifies the payload before executing the service hook.
To achieve this, inherit from the default webhook action as shown in the following example: 

using System;
using System.ComponentModel;
using System.ComponentModel.DataAnnotations;
using System.Threading;
using System.Threading.Tasks;
using Progress.Sitefinity.Renderer.Designers.Attributes;
using Telerik.Sitefinity.ServiceHooks;
using Telerik.Sitefinity.ServiceHooks.Model;
namespace SitefinityWebApp
{
public class CustomWebhookActionSettings : WebhookActionSettings
{
/// <inheritdoc />
public override string Title
{
get
{
return ActionTitle;
}
}
/// <inheritdoc />
public override Type ParametersType
{
get
{
return typeof(CustomWebhookActionParameters);
}
}
/// <inheritdoc />
public override Task<ServiceHookActionResult> ExecuteActionAsync(ITriggerData triggerData, object parameters, CancellationToken cancellationToken)
{
// Set custom payload before calling base.ExecuteActionAsync()
// in order to override the default payload
triggerData.CustomPayload = new
{
Name = triggerData.Name,
Item = triggerData.Item,
SendDate = DateTime.Now.ToString(),
ApiKey = ((CustomWebhookActionParameters)parameters).ApiKey
};
return base.ExecuteActionAsync(triggerData, parameters, cancellationToken);
}
private const string Name = "CustomWebhookAction";
private const string ActionTitle = "Send data to URL (Custom)";
public class CustomWebhookActionParameters : WebhookActionSettings.WebhookActionParameters
{
[Required]
[DisplayName("API Key")]
[Placeholder("Please enter your API key here...")]
public string ApiKey { get; set; }
}
}
}

NOTE: In order to use all available attributes in CustomWebhookActionParameters class you need to install Progress.Sitefinity.Renderer nuget package. For more information, see Widget designers

To register your custom action in the system, you need to have a module that implements the IServiceHookActionProvider interface which returns the new action in the GetServiceHookActionsSettings() method.  

using System;
using System.Collections.Generic;
using SitefinityWebApp;
using Telerik.Sitefinity;
using Telerik.Sitefinity.Abstractions;
using Telerik.Sitefinity.Configuration;
using Telerik.Sitefinity.ServiceHooks;
using Telerik.Sitefinity.Services;
[assembly: SitefinityModule(SampleModule.ModuleName, typeof(SampleModule), SampleModule.ModuleName, "", StartupType.OnApplicationStart)]
namespace SitefinityWebApp
{
public class SampleModule : ModuleBase, IServiceHookActionProvider
{
public override Guid LandingPageId
{
get { return Guid.Empty; }
}
public override void Initialize(ModuleSettings settings)
{
base.Initialize(settings);
App.WorkWith().Module(Name)
.Initialize();
}
public override void Install(SiteInitializer initializer)
{
}
protected override ConfigSection GetModuleConfig()
{
return null;
}
public override Type[] Managers
{
get { return null; }
}
IDictionary<string, IServiceHookActionSettings> IServiceHookActionProvider.GetServiceHookActionsSettings()
{
var actionSettings = new Dictionary<string, IServiceHookActionSettings>();
actionSettings.Add("CustomWebhookAction", new CustomWebhookActionSettings());
return actionSettings;
}
internal const string ModuleName = "SampleModule";
}
}

After you have implemented and registered your custom action you are ready to configure your first service hook to start sending the new payload.  

  1. Navigate to Administration » Servicehooks  
  2. Click Create.  
  3. Under the Action label there is a dropdown selector where you can now select your custom action (Send data to URL (Custom) in the example) instead of the default one
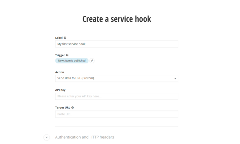
    custom service hook
  4. With the custom action, there is a new field in the UI, API Key, which can now be configured and used in the construction of the modified payload. Here’s an example payload from the new service hook:


{
"Name": "News item is published",
"Item": {
"Id": "2757f79a-b143-462b-9ddc-32bf586b968e",
"LastModified": "2021-08-11T15:21:37+03:00",
"PublicationDate": "2021-08-11T14:48:01+03:00",
"Title": "Sample news item",
"Description": "",
"DateCreated": "2021-08-11T14:48:01+03:00",
"IncludeInSitemap": true,
"UrlName": "sample-news-item",
"ItemDefaultUrl": "/2021/08/11/sample-news-item",
"Tags": [],
"Category": [],
"AllowComments": true,
"Summary": "",
"Content": "The content of the news item.",
"Author": "",
"SourceName": null,
"SourceSite": null,
"Provider": "OpenAccessDataProvider",
"Comments": []
},
"SendDate": "8/11/2021 3:21:38 PM",
"ApiKey": "My_personal_API_Key"
}

Want to learn more?

Increase your Sitefinity skills by signing up for our free trainings. Get Sitefinity-certified at Progress Education Community to boost your credentials.

Get started with Integration Hub | Sitefinity Cloud | Sitefinity SaaS

This free lesson teaches administrators, marketers, and other business professionals how to use the Integration hub service to create automated workflows between Sitefinity and other business systems.

Web Security for Sitefinity Administrators

This free lesson teaches administrators the basics about protecting yor Sitefinity instance and its sites from external threats. Configure HTTPS, SSL, allow lists for trusted sites, and cookie security, among others.

Foundations of Sitefinity ASP.NET Core Development

The free on-demand video course teaches developers how to use Sitefinity .NET Core and leverage its decoupled architecture and new way of coding against the platform.

Was this article helpful?