This section describes the guidelines for deploying DataDirect XQuery® on an application server running IBM WebSphere Application Server V6.1.
- Start the WebSphere Administrative Console.
- Install DataDirect XQuery® in WebSphere.
- Browse to Resources < JDBC < JDBC Providers, and choose Create a New JDBC Provider.
-
The Create a New JDBC Provider window appears.
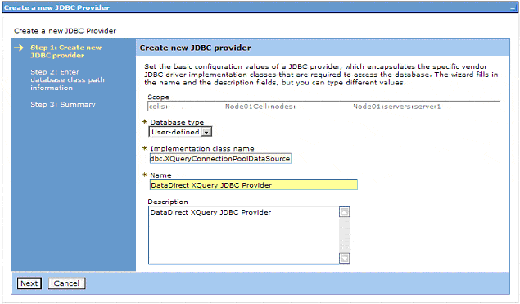
- Specify the following properties with the values shown here:
- Database type — "User-defined"
- Implementation class name — "com.ddtek.xquery3.jdbc.XQueryConnectionPoolDataSource"
- Name — "DataDirect XQuery JDBC Provider"
- Click Next.
-
The Database Classpath Information window appears.
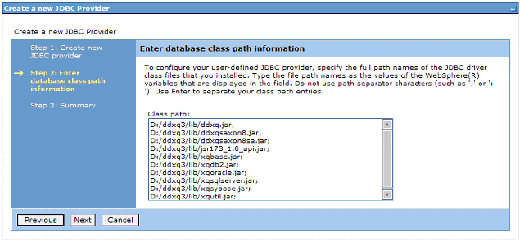
- Specify all the DataDirect XQuery jar files; these files are in the \lib directory of your DataDirect XQuery installation.
- Click Next.
- Approve the information entered in the previous step.
- Click Next to complete the JDBC provider definition.
- Next, create a JDBC DataSource resource.
- Browse to Resources < JDBC < Data Sources, and choose Create a New JDBC Data Source.
-
The Create a Data Source window appears.
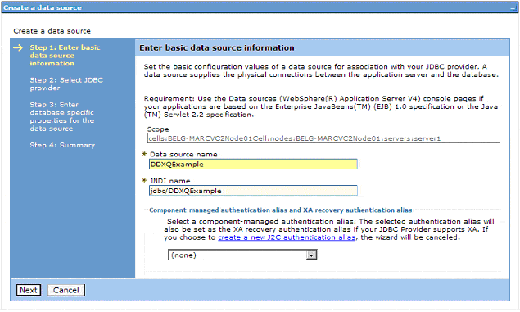
- Specify the following properties with the values shown here:
- Data source name — "DDXQExample"
- JNDI name — "jdbc/DDXQExample"
- Click Next.
-
The Enter database specific properties for the data source window appears.
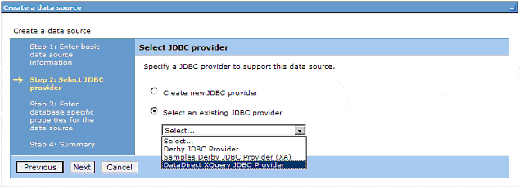
- Select the Select an existing JDBC provider radio button, and choose "DataDirect XQuery JDBC Driver".
- Click Next and confirm the information you have just entered.
- Next, set the properties for the DDXQExample on the Data sources configuration window.
-
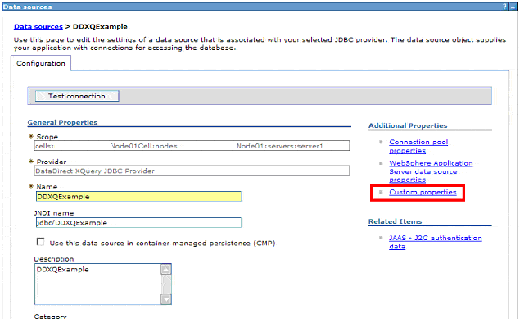
- Specify "DDXQExample" in the Name field on the Configuration tab, and then choose Custom properties.
-
The Custom properties window appears.
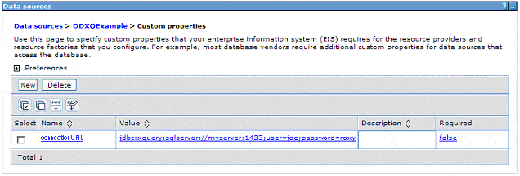
- Add the required data source properties.
- Deploy the servlet by browsing to Applications < Install New Application, and choose to deploy DDXQServlet.ear .
- Open your Web browser and point it to http://myserver:9080/DDXQServlet/.
Example
See the Example: JDBC Connection Pooling Servlet for an example of implementing a JDBC connection pool in DataDirect XQuery®.