This section describes the guidelines for deploying DataDirect XQuery® on an application server running Oracle Application Server 10g.
Before You Begin
Before you begin, make sure you have installed DataDirect XQuery® by copying the DataDirect XQuery® jar files to Oracle_Application_Server_home/j2ee/home/applib, where Oracle_Application_Server_home is your Oracle Application Server installation directory.
Deploying on Oracle Containers for J2EE
To deploy DataDirect XQuery® on an application server running Oracle Containers for J2EE 10g, you need to:
- Create and configure a JDBC DataSource resource
- Create the JNDI binding for the resource
- Deploy the servlet
These steps are described in the following sections.
Creating and Configuring a JDBC DataSource Resource
To create and configure a JDBC DataSource resource:
- Start the Oracle Enterprise Manager.
- Browse to Administration > Services > JDBC Resources.
-
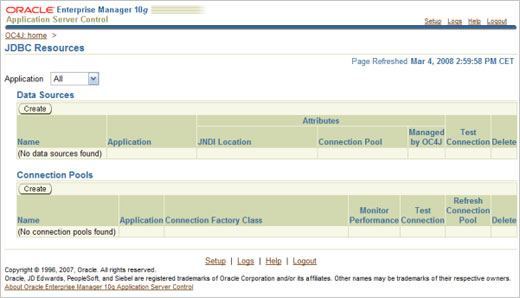
- Next, create a JDBC DataSource resource:
- Click the Create button under Connection Pools.
-
The Create Connection Pool – Application window appears.
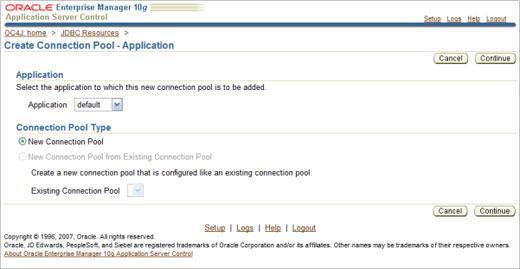
- Select New Connection Pool under Connection Pool Type and click the Continue button.
-
The Create Connection Pool window refreshes, as shown here:
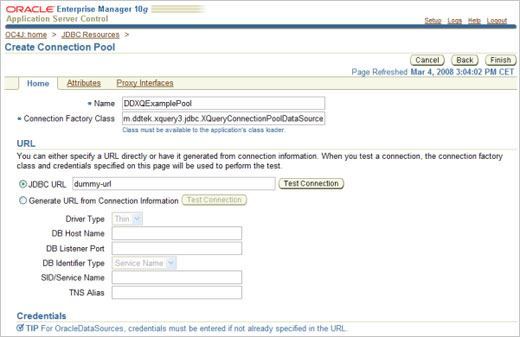
- Specify the following properties with the values shown here:
- Name —DDXQExamplePool
- Connection Factory Class — com.ddtek.xquery3.jdbc.XQueryConnectionPoolDataSource
- JDBC URL — dummy-url
- Scroll to the bottom of the page and click the “Add Another Row” button.
-
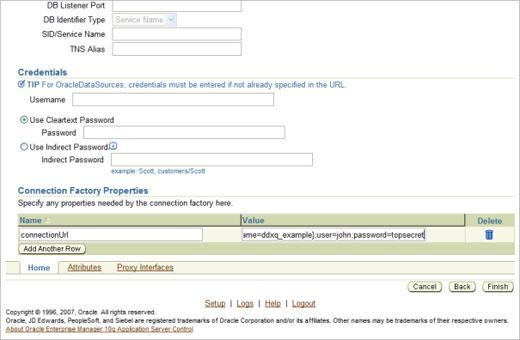
- In the Name field, type connectionUrl. In the Value field, use the URL described in “Configuring a Connection Through the JDBC Driver Manager” in the DataDirect XQuery User’s Guide and Reference.
- Next, click the Attributes tab to set some of the properties of the pool.
-
Because Oracle Application Server supports advanced pooling properties only with Oracle data sources, you need to set timeout values.
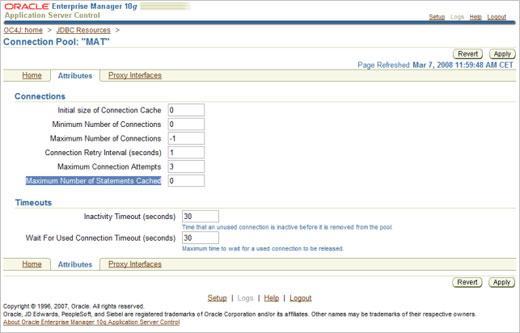
Note the following before setting the Inactivity Timeout (seconds) field:
Oracle Application Server is not able to detect stale connections in the pool; nor is it able to ping unused connections to keep them active. Because of this, it is possible that your database or firewall will close idle connections.
To prevent this from occurring, set the Inactivity Timeout (seconds) field to a value lower than the database session idle timeout. If this value is not set appropriately, your connection in the pool can become corrupt and subsequent requests for a connection from the pool will result in your application receiving a stale connection.
- Once you have set the timeout values, click the Apply button.
Creating the JNDI Binding
Once you have created the JDBC DataSource resource, you need to create the JNDI binding:
- From the JDBC Resources window, click the Create button under DataSources.
-
The Create Data Source – Application & Type window appears.
- Make sure the Application field is set to default and that the Data Source Type is set to Managed Data Source, and then click the Continue button.
-
The Create Data Source – Managed Data Source window appears:
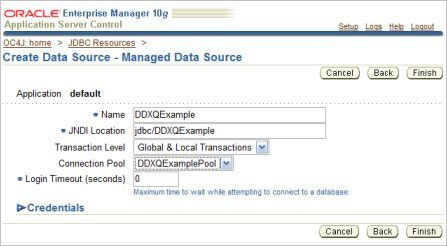
- Specify the following properties with the values shown here:
- Name — DDXQExample
- JNDI Location — jndi/DDXQExample
- Transaction Level — Global & Local Transactions Only
- Connection Pool — DDXQExamplePool
- Click the Finish button.
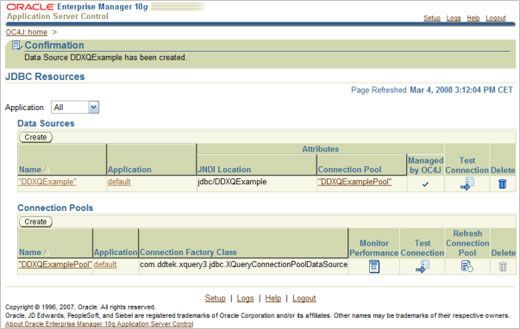
-
You are returned to the JDBC Resources window:
Deploying the Servlet
To deploy the servlet:
- Return to the Oracle Enterprise Manager Home and select the Applications tab:
-
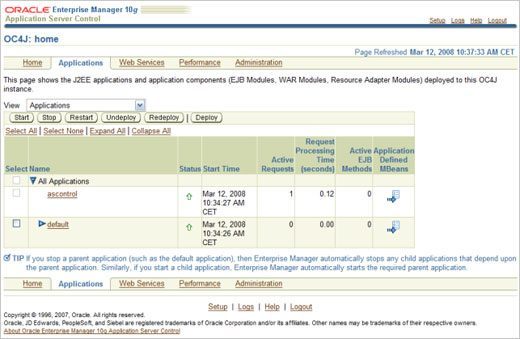
- Click the Deploy button, and choose to deploy DDXQServlet.ear.
- Open your Web browser and test the application.
Example
See the Example: JDBC Connection Pooling Servlet for an example of implementing a JDBC connection pool in DataDirect XQuery®.